Pin It button on image hover
Showing posts with label healthy. Show all posts

Sunday, March 9, 2014

Duck Breast with Fennel Sauce and Oyster Mushrooms | You've Got Meal!


It’s duck season in the Youvegotmeal! kitchen, so it’s only natural that we had to cook a duck breast recipe. We had a whole duck that we portioned  into different cuts for different dishes, keeping the legs and the wings for some “confit de canard” and the breast for this recipe. You might recognize the last part of the title- the oyster mushrooms from a previous post. Frying them in tempura batter was a great side-dish for the meat. 


Ingredients: 
  • 2 duck breasts, about 200 grams each, 
  • 1 medium fennel bulb, 
  • 400 ml of coconut milk, 
  • 250 grams of oyster mushrooms, 
  • tempura batter
  • cloves, 
  • ground cardamom, 
  • salt, pepper, 
  • soy sauce, 
  • sugar, 
  • chili, 
  • fresh coriander leaves.


A couple of notes about the meat. We had a free-range duck (can I say that? Is it a thing?), meaning that the layer of fat that covered the meat was a bit thicker than what you would normally get. That’s an important thing to take into consideration because you want that fat rendered and, also, it affects the whole cooking time of the breast. Before actually cooking scar the breast on the skin with a sharp knife, careful not to reach the meat- this will help the fat reduce and give a you a nice look on the breast. Also, rub the duck meat with salt, pepper and ground cardamom.

 We started with the fennel sauce for this dish, the only reason being is that it took the most time. In a tall sauce pan, pop in the coconut milk, the finely sliced fennel, 1 tbs. of soy sauce, 1 tsp. of chili flakes or half of a fresh, medium hot chili, finely diced, 2-3 cloves, the sugar. Boil it down on until the fennel is soft enough to be pushed through a sieve into a sauce – 15-20 minutes.


  1. For the meat, use a heavy base pan, put the meat skin side down in it and place it on the stove on medium heat. 
2.  We cooked from a cold pan to give the fat enough time to slowly melt and not just burn. 
3.  Cook the breast skin side down for around 10-11 minutes, turn and cook for another 2 minutes. 
4.  Remove from the pan and let the meat rest for 5-7 minutes on a warm plate.


Plate the meat, the mushrooms and the sauce, and sprinkle some chopped coriander leaves on top.

Enjoy,


Thursday, March 6, 2014

Tempura Mushroom with Wassabi | You've Got Meal!


If you Internet people out there have read any of our previous posts before (who am I kidding, I know you love us), you’ve probably noticed the fact that we talked a lot about the pleasure of keeping, sometimes, things simpler in the kitchen. 


Of course we love to get fancy, combining spices and ingredients, adding and taking quantities, but, in the end, we get the best satisfaction from the simple or the classic (take our home-made pasta or the duck fat fries). Same thing goes for frying veggies in tempura batter, and I remember last spring when we had the best baby zucchini ever, just fried in some tempura.


We’re not really describing a recipe here, we’re rather telling you of a great cooking experience when we combined tempura batter and some beautiful oyster mushrooms.

Making the tempura batter couldn’t be easier, you just need some fizzy water and wheat flour. I guess you do have to be determined to do it, I remember Mrs. G saying “I’m gonna own this batter” before starting. We used one egg, 200 ml ice cold sparkling water and 250 g smooth flour, but the thing you have to remember is 1. Use ice cold fizzy water, or even add an ice cube to the mixture and 2. Don’t overwork the batter.

For a bit of a kick, we added about 1 tsp. of wasabi paste in the tempura, just enough to give it a slight punch.


Separate the oyster mushrooms and dip the separately in the batter for a couple of seconds, dripping the excess of tempura. Fry the oyster mushrooms in some super hot cooking oil, until it gets a nice golden color on each side, and you’re done. Don’t keep the mushrooms for too much in the oil, the batter will burn and they will get soggy, you want to keep a firm texture.


We used the mushrooms as a great side-dish for some great duck breast, but that’s a story for another time.  


Enjoy,

Thursday, February 27, 2014

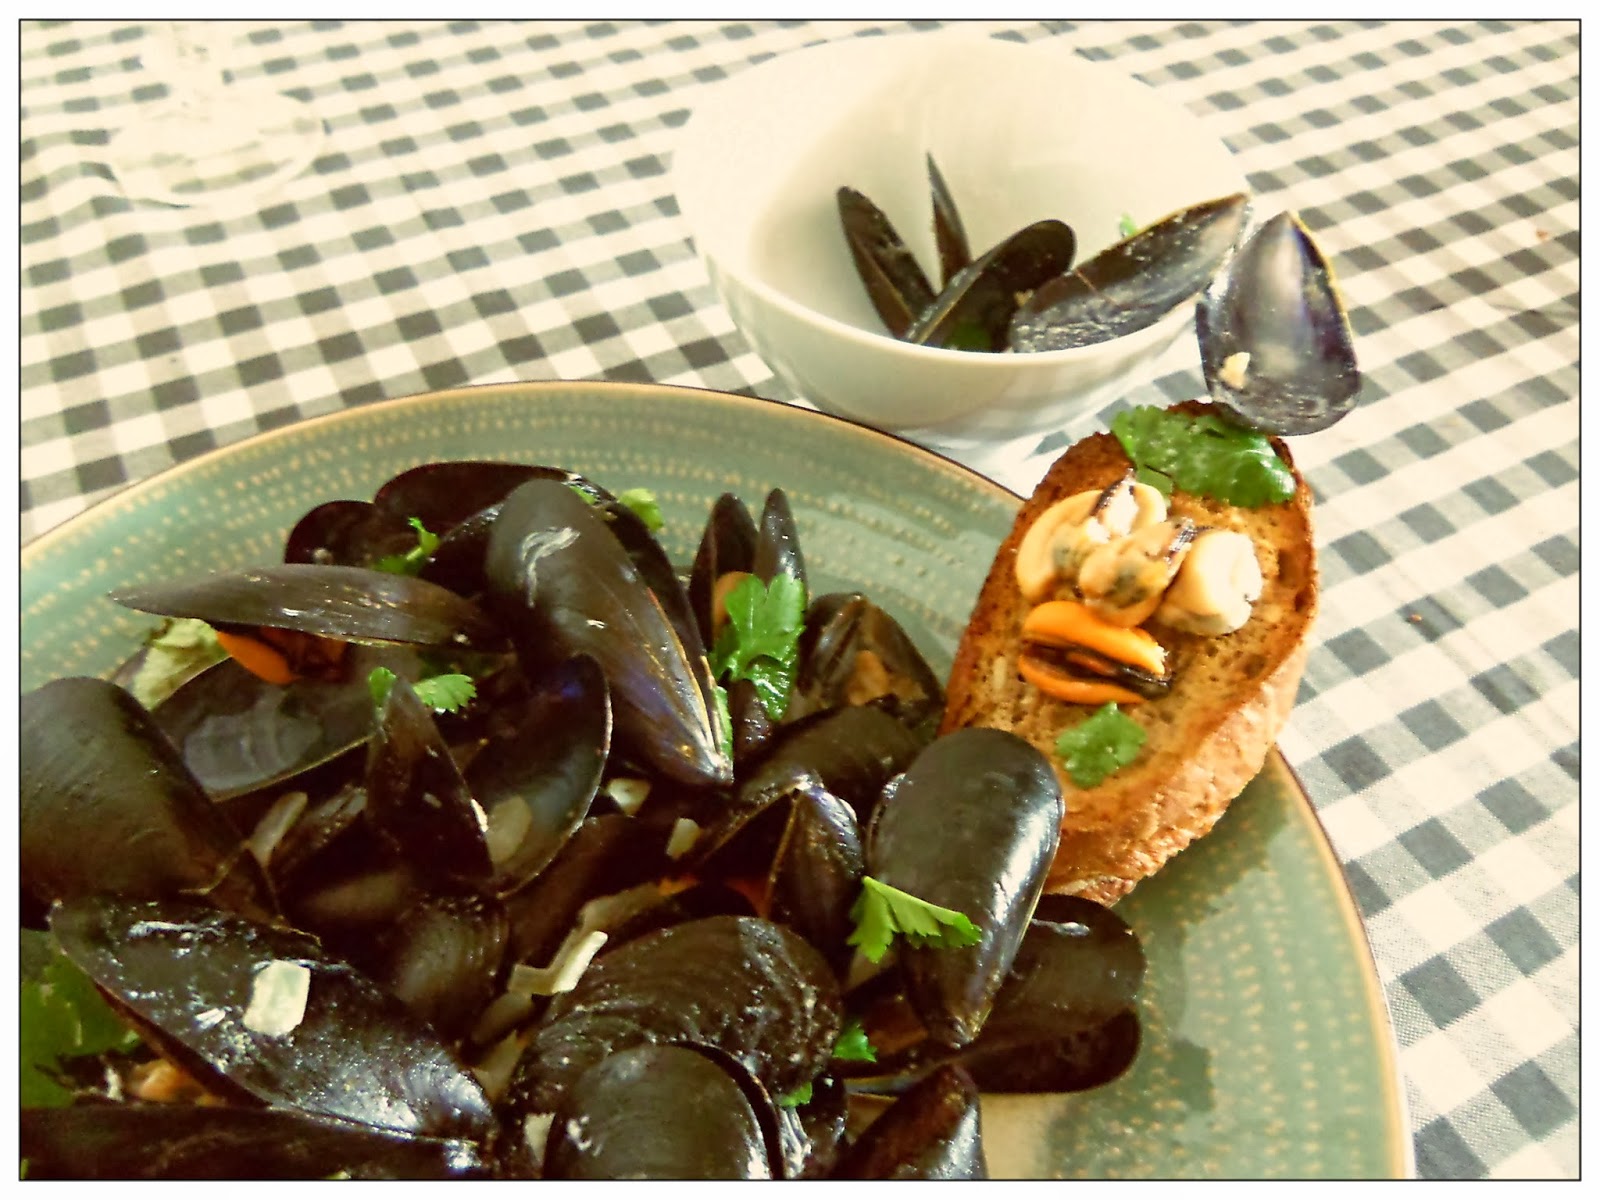
Mussels in White Wine Sauce (Moules Mariniere) | You've Got Meal!


Mussels are one of our favorite choices when we want to cook seafood in the Youvegotmeal! kitchen, and for obvious reasons. They’re delicious, light, easy to cook and look great at the table. 


Unfortunately, when dealing with fresh mussels the most difficult part is cleaning them, but you can’t skip this part, especially when you’re using them whole. Scrub the mussels with a wire wool and make sure to remove the “mustache” or “beard” of the clam, meaning the algae that sometimes hangs from inside the mollusk.


 Cooking the mussels in some white wine sauce is one of the classic ways to do it and I’m sure you can find dozens, if not hundreds, of variations of this dish on-line. The concept is a simple one, and we made best with ingredients at hand:

  • 1,5 kg of whole mussels, 
  • 1 medium onion, 
  • 3-4 garlic cloves, 
  • some nice dry white wine, 
  • coriander, 
  • parsley, 
  • salt, pepper,
  • olive oil, 
  • cooking cream


  • First of all separate the leaves and stalks of your greens. The idea is to use the leaves, that are more tender in the end of the cooking process and the stalks from the beginning. 
  • Bind the stalks of coriander and parsley with some string in order to easily remove it later – you can also add some lemon thyme springs to the coriander and parsley stalks and create a very nice bouquet garni. 
  • Next, start  cooking the finely diced onion and garlic cloves in the hot oil, on medium heat, for 3 minutes, with the stalks in. 


  • Add the wine, about 100-150 ml, bring to a boil, kick the heat up and pop the mussels in. 
  • Cover the pan and let the clams open in the wine steam for 4-5 minutes- throw away any mussels that don’t open. 
  • Remove the top, add some cooking cream for color (about 50 ml) with the parsley and coriander leaves. 


Serve the mussels with some crunchy bread and the rest of your white wine.


Enjoy,

Sunday, February 23, 2014

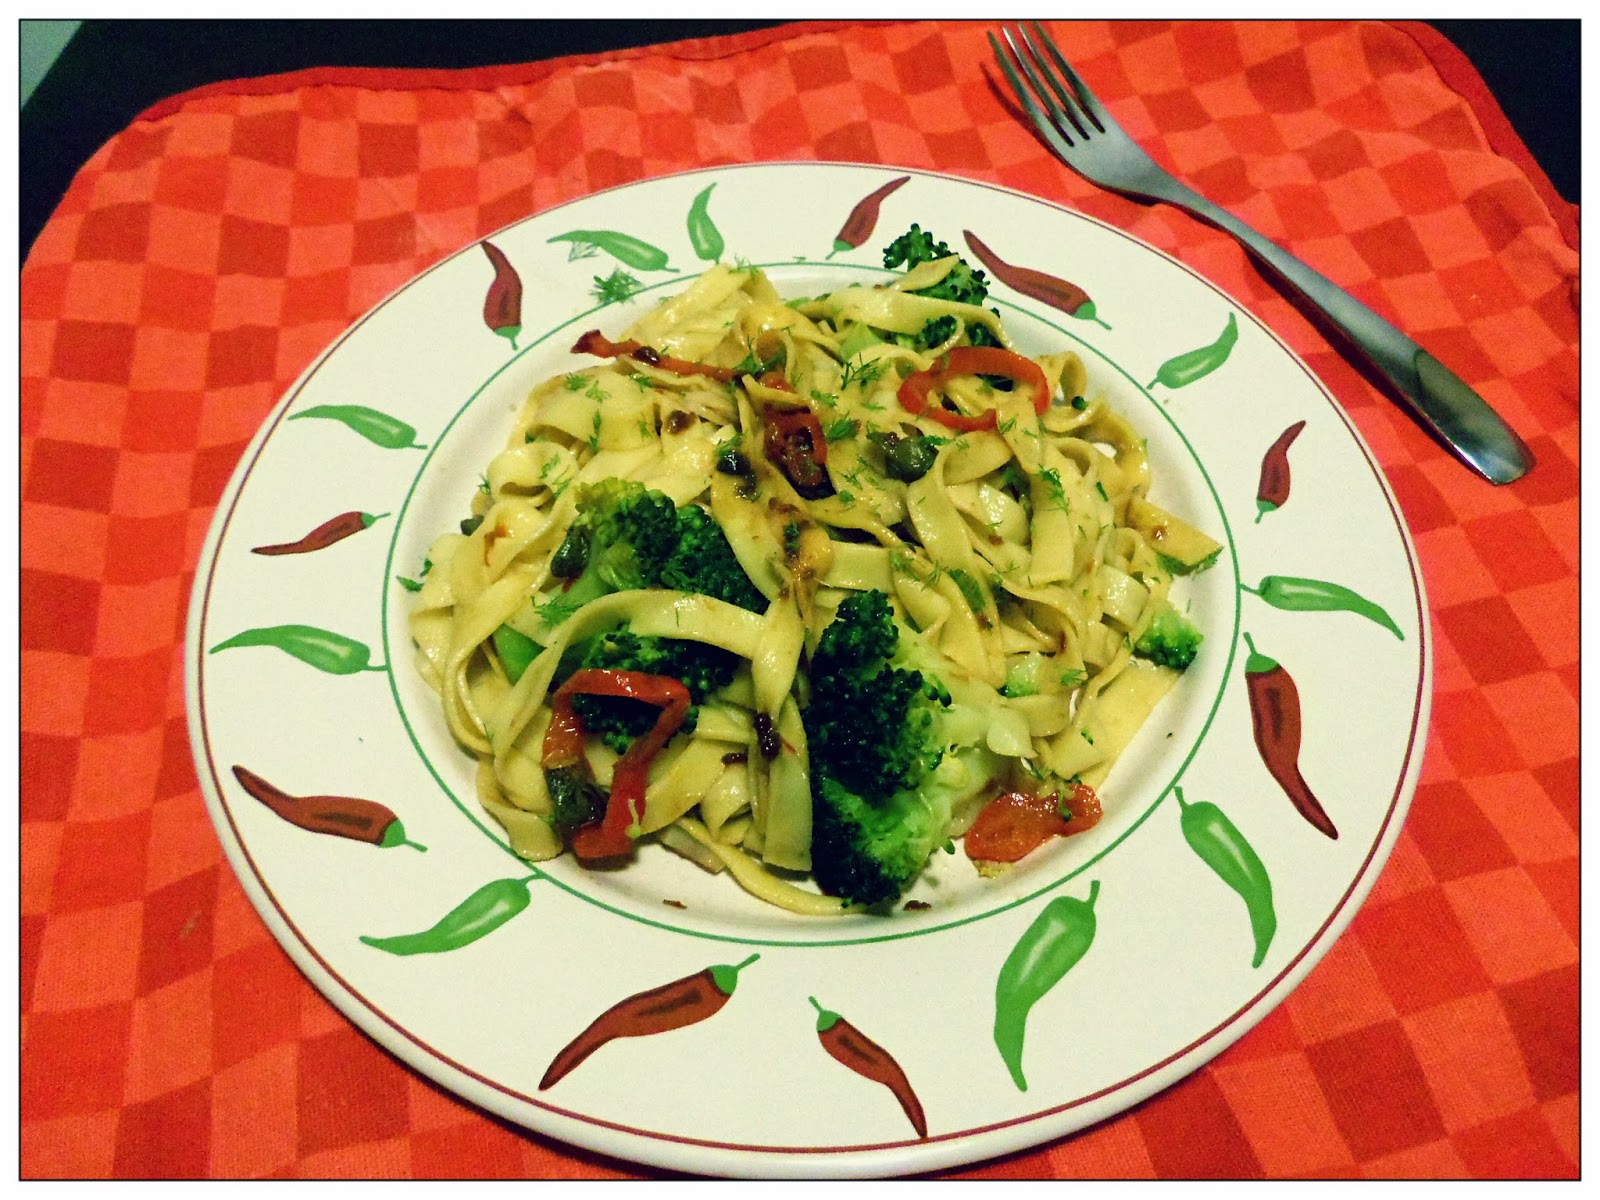
Broccoli and Anchovies Tagliatelle | You've Got Meal!


This recipe is about using some of the most common items in your pantry, in order to create a super simple and easy to cook fresh pasta recipe that is sure to give you a lift after a hard day’s work or accompany a nice glass of Pinot Grigio for brunch.


The ingredients are: 

  • Tagliatelle, of course (home made from 200 grams of flour and 2 eggs, quantities that make enough for 3), 
  • 8-9 anchovies fillets, 
  • 4-5 cloves of garlic, 
  • 400 grams of broccoli florets, 
  • about 100 grams of red pepper (we used the Kapia for this because of the shape), 
  • 50 grams of capers, 
  • the juice from half a lemon, 
  • salt, pepper, chili flakes,
  • fennel leaves or parsley for garnish

We talked a lot about homemade pasta in past posts, and we most certainly hope that you guys give it a try because it’s definitely worth the extra effort. Bring a large pot of salted water to the boil; it should be big enough to give both the pasta and the broccoli room to boil. I suggest starting with the sauce (if you can call it that) after the water starts boiling as it takes very little time and you want the pasta done in time. So, in heavy base large frying pan, heat up some olive oil on medium heat and pop in the sliced peppers and anchovies, cook them until the fish dissolves in the hot oil, it will take about 3 minutes. Again, keep in mind that you need to synchronize your pasta with the anchovies very well. 


For the homemade tagliatelle the cooking time was about 5 minutes, so we added the pasta to the water at the same moment as we started cooking the fillets. So, next, add the garlic and capers in the oil and cook for 1 minute. At the same time pop the broccoli in the pasta water and cook the vegetable and the tagliatelle for 1 minute – you want to sync the capers&garlic with the broccoli. After that, use whatever kitchen tool you need to remove the broccoli and pasta and put them in the anchovy pan. Mix the ingredients well so the tagliatelle are covered by the anchovy flavored oil. Remove from heat and sprinkle the lemon juice on the whole thing, feel free to add more if you find it necessary. For garnish you can use some parsley leaves, but we went for some fennel.


Enjoy,

Sunday, February 9, 2014

Shrimp Ceviche | You've Got Meal!


I remember the first time we saw ceviche being made we were a bit amazed by the simplicity and the flavours that were involved, so we decided we should give it a try. For us, ceviche works great as an appetizer or starter to the meal, as the tanginess and the zing of the lime combine with the light touch of the seafood can get things started for heavier meals. We decided to use shrimps in our ceviche, but you can also use fresh fish, emphasis on the fresh part – you won’t be cooking with heat so this part is important in order to avoid any intestinal problems after. 


Let’s talk ingredients:  

  • 12 medium shrimps, 
  • fennel, 
  • radicchio, 
  • avocado, 
  • coconut, 
  • salt, pepper, 
  • the juice of 2 limes 
  • 1 lemon.


We boiled the shrimp for 2 minutes then popped them in ice water, but you can choose to use them raw. We just wanted to play it safe on our 1st try on the ceviche. So, clean, devein and remove the shrimp tails and put them in the citrus juice for about 45 minutes, alongside the salt, pepper and the thinly sliced fennel. And that’s it, nothing more.


Put some finely sliced radicchio on the bottom of a glass, some fennel and avocado on top, and 3 shrimps per portion. Use 4-5 tbs. of the lemon juice for each glass and mix it with the water from 1 coconut – it will just add a hint of flavor without taking the dish off course. Pour some juice on in each glass and you’re ready to impress your party guests. A great addition to the dish could be a touch of heat from a chili or some fresh coriander leaves, take your pick.


We paired the ceviche with some well chilled Sauvignon Blanc that worked great with its mineral, citrusy, grassy touches.  

Enjoy,

Sunday, January 26, 2014

Cod, Couscous and Zucchini | You've Got Meal!


Let me assure you right from the beginning that there is more to this dish than an enumeration of the ingredients listed above. The fish works great with the fluffy, flavored couscous, the mellow zucchinis elevate the combo and a harissa-yoghurt sauce brings everything together. 

So let’s talk ingredients: 
  • a couple pieces of cod (we used some frozen ones), 
  • about 150 grams of couscous,  
  • sun dried tomatoes, 
  • spring onions, 
  • 2-3 garlic cloves, 
  • 2 medium zucchinis, 
  • 1 lemon, 
  • Greek yogurt,
  • Harissa sauce.


  1. Start of by cooking the zucchini: cut them in medium sized chunks, give them a good splash of olive oil, a pinch of salt and pepper and place them in an oven proof pan, with 2 halves of a lemon. Cook in the preheated oven, medium-high heat for around 20 minutes. Taste from time to time, just to make sure you don’t overcook the vegetables.
  2. Next, the couscous. I think that the only thing simpler than cooking couscous is eating cereals for breakfast. Put the couscous in a bowl, pour hot water over it until in covers it for about 1 cm. Use some cling film to cover the bowl and wait until all the liquid is absorbed. Use a fork to fluff the couscous. Mix in some finely chopped sun dried tomatoes with a couple tbs. of their oil, crushed garlic and spring onions.
  3. You can cook the cod any way you feel like it: grilled, seared, in the oven. We rolled the cod pieces in some cornmeal crust and then we fried the fish in some olive oil until it got a beautiful golden crust.
  4. Plate everything, including  a healthy amount of yoghurt and Harissa sauce next to the fish and veggies. Grab your favorite salad mix (indulge yourself with that little cheat) and place a nice hand of the crunchy leaves, sprinkle a splash of the baked lemon juice on top. Be careful though, the juice gets a fair amount of bitterness from the zest when cooked, so it may be a little bit overwhelming. 


Trust, you can’t go wrong with this combo, it has everything you need – fish, veggies, couscous and a hell of a kick from the baked lemon juice. You can choose to replace the fish with another type, fresh herring or mackerel. Also, if you can’t get Harrisa sauce, just make your own, boil down some passata juice mixed with tomato concentrate, hot pepper jam, cumin, all spice, sugar, a touch of rose water and saffron. Or whatever  condiments you feel like having in your sauce – it’s just that easy.

Enjoy,

Tuesday, January 21, 2014

Oven Roasted Carp and Peas | You've Got Meal!


Big shocker right in the title, Internet – you can actually eat carp and it’s delicious. I’ve seen a lot of people who consider carp kind of a second-hand fish and don’t really consider it worthy for their kitchen. I can assure you that that is not the case. Fresh, river caught carp can be a knock-out at a table (in the good sense of the way) and it can hold its own against more popular fresh water fish like trout. The thing to remember here is that the bigger the carp is, the fattier it will be, so make sure to pick your fish accordingly. 


So, if you’re going for a nice oven roasted  filet, pick a leaner cut. But, let’s say, for a fisherman’s sour soup (yum, it makes my mouth watery just by typing it) or for grilling on a coal barbecue you can get a fattier piece (there is such a thing called carp belly and it’s great for this last category, with some grilled vegetables and some thyme flavored light brine).  


So let me take you through this recipe that literally takes to cook 15 minutes. You’re going  to need a lean filet of carp (about 200 grams per person), some fresh thyme leaves, a can of peas, some garlic cloves, salt, pepper and olive oil. 
  • Simply rub salt, pepper on the fish and sprinkle with the thyme leaves and olive oil. 
  • Place the carp on an oven proof rack, pop a tray under it so any juices won’t trickle directly on the oven. 
  • Cook the fish on high heat for 13-15 minutes. In the last minute, heat up some olive oil in a pan, cook a couple of whole garlic cloves for 30 seconds, then give the drained peas the same amount of time to heat through, then add some salt and pepper. 


Plate the carp with the peas and sprinkle some lemon juice on top and you’re done. Nothing fancy, nothing elaborate, everything is done in 15 minutes. If you’re looking to try some carp, don’t overdo it in your first recipe, try something simple, with only a couple of flavors, that can give you an idea of the taste of the fish and I’m sure you’re going to be back at your fishmonger for more carp.


Enjoy,

Related Posts Plugin for WordPress, Blogger...