Pin It button on image hover
Showing posts with label best recipe. Show all posts

Tuesday, April 1, 2014

Chicken and Avocado Wrap | You've Got Meal!


The previous post was all about making the most out of chicken leftovers. A salad is always a great way to use them, but let's not forget about the wrap. Probably my favorite choice for lunches at the office. Just like in a salad, you can incorporate a lot of healthy options in a wrap, but also add lots of flavor.

We used the rest of the roasted chicken we talked about and add one by one:
  • half of avocado (mashed with a fork)
  • some fresh red onion rings
  • some hot pepper slices
  • some thin slices of tomatoes
  • cress leaves
  • yogurt based dressing
For the yogurt dressing I used:
  • 150 ml yogurt
  • the juice from 1/2 lemon
  • finely chopped parsley leaves
  • 1 crushed garlic clove (optional)


Adding the avocado and cress leaves and using yogurt instead of mayonnaise is a great healthy choice and I can guarantee you will not lose taste and flavor.

Enjoy,

Saturday, March 1, 2014

Spinach and Ricotta Ravioli | You've Got Meal!


This is our first ravioli making experience, so we wanted to cook something on the easy side, but also a well known dish, so we went for safe and picked the spinach and ricotta recipe. 

We used 4 sheets of pasta dough, about 40 cm long and 6 cm wide, enough to make around 20 pieces of ravioli. 


For the filling: 
  • 200 grams of fresh spinach leaves- hard stems removed, 
  • 130-150 grams of ricotta, 
  • 4-5 tbs. of parmesan, 
  • nutmeg, 
  • salt and pepper. 


We also made a fresh tomato and basil sauce using: 
  • 1 can of whole tomatoes, 
  • 300 grams of passata, 
  • 3 garlic cloves, 
  • 2 tsp. of dried basil leaves, 
  • salt, pepper, 
  • cloves, 
  • olive oil. 


  1. Start of by making the dough for the pasta -  as usual, we used 200 grams of plain flour and 2 free range eggs, resulting the sheets of pasta described above. 
  2. While the dough rests, awaiting to be rolled, cook the spinach in a couple tbs. of olive oil for 2 minutes, enough for the greens to melt. 
  3. Remove the spinach from heat, dripping any excess of juices that remained in the pan – those will make the filling way too runny and most likely cause the ravioli to open while cooking. You can choose to leave the spinach leaves whole, finely chop them or just coarsely break them, take your pick. 
  4. After the spinach cools for some minutes, mix them well with the ricotta, nutmeg, salt, pepper and about 4-5 tbs. of Parmesan. 
  5. You can either cut the ravioli pasta pieces before putting in the filling or you can spread lumps of the spinach&ricotta mix on the sheet of pasta, and then cut it. Use a beaten egg to brush the edges of the pasta so that the pasta sticks -  you can also use a fork to press the edges of the ravioli, but make sure to remove the air from inside before. 
  6. The ravioli cook fast enough in the salted boiling water, about 4 minutes. 
  7. When removing them from the water lightly drizzle them with olive oil to make sure they don’t stick.

The sauce keeps the same super easy line of cooking – on medium heat, bring to a boil the canned tomatoes (use a wooden spoon to break them in the pot), 300 ml of tomato passata, the finely sliced garlic cloves, the basil, salt, pepper, 2-3 whole cloves, and cook until the liquid is reduced to about two thirds. Next, push the sauce through a fine sieve (don’t forget the garlic slices, they will be soft enough to be pushed through) in order to create a smooth, light tomato and basil sauce. 


That’s it really incredibly easy to make ravioli, accompanied by an light and elegant sauce that will complement the pasta perfectly. Garnish with some fennel leaves or basil or parsley, grate some Parmesan on top and you are done.

Enjoy,

Thursday, February 27, 2014

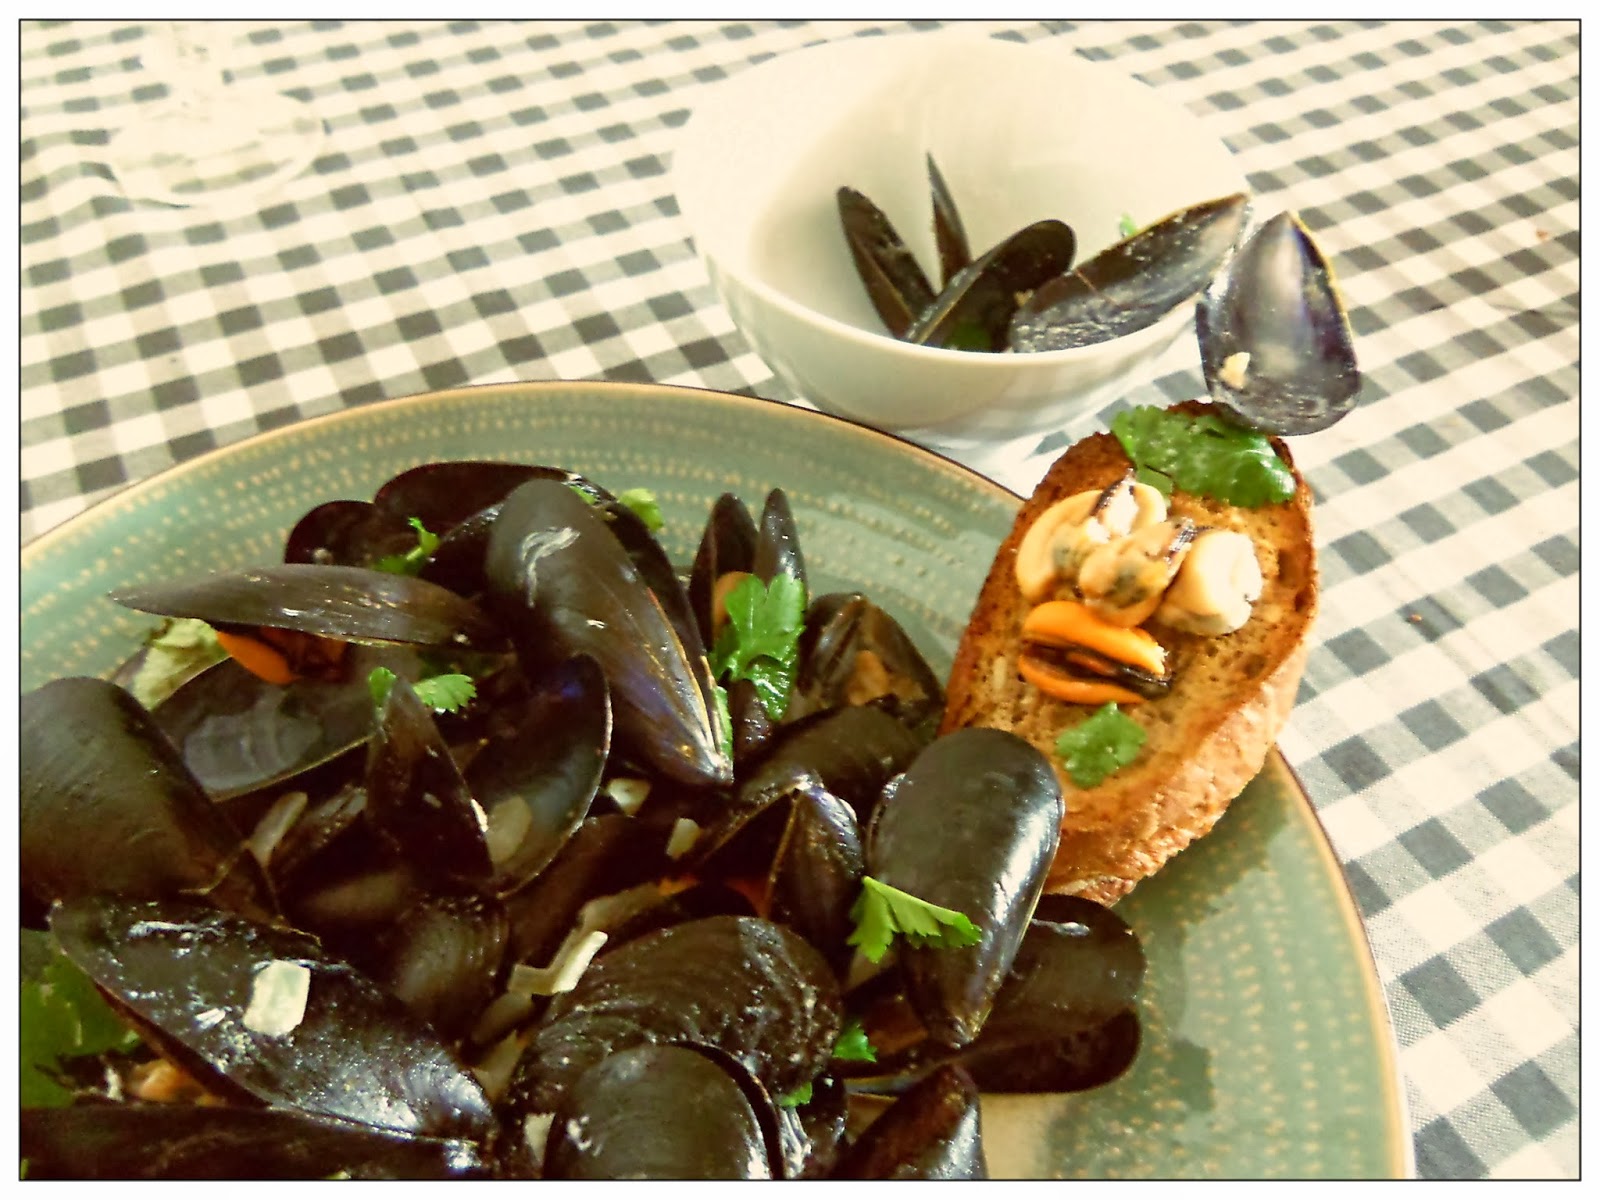
Mussels in White Wine Sauce (Moules Mariniere) | You've Got Meal!


Mussels are one of our favorite choices when we want to cook seafood in the Youvegotmeal! kitchen, and for obvious reasons. They’re delicious, light, easy to cook and look great at the table. 


Unfortunately, when dealing with fresh mussels the most difficult part is cleaning them, but you can’t skip this part, especially when you’re using them whole. Scrub the mussels with a wire wool and make sure to remove the “mustache” or “beard” of the clam, meaning the algae that sometimes hangs from inside the mollusk.


 Cooking the mussels in some white wine sauce is one of the classic ways to do it and I’m sure you can find dozens, if not hundreds, of variations of this dish on-line. The concept is a simple one, and we made best with ingredients at hand:

  • 1,5 kg of whole mussels, 
  • 1 medium onion, 
  • 3-4 garlic cloves, 
  • some nice dry white wine, 
  • coriander, 
  • parsley, 
  • salt, pepper,
  • olive oil, 
  • cooking cream


  • First of all separate the leaves and stalks of your greens. The idea is to use the leaves, that are more tender in the end of the cooking process and the stalks from the beginning. 
  • Bind the stalks of coriander and parsley with some string in order to easily remove it later – you can also add some lemon thyme springs to the coriander and parsley stalks and create a very nice bouquet garni. 
  • Next, start  cooking the finely diced onion and garlic cloves in the hot oil, on medium heat, for 3 minutes, with the stalks in. 


  • Add the wine, about 100-150 ml, bring to a boil, kick the heat up and pop the mussels in. 
  • Cover the pan and let the clams open in the wine steam for 4-5 minutes- throw away any mussels that don’t open. 
  • Remove the top, add some cooking cream for color (about 50 ml) with the parsley and coriander leaves. 


Serve the mussels with some crunchy bread and the rest of your white wine.


Enjoy,

Sunday, February 9, 2014

Shrimp Ceviche | You've Got Meal!


I remember the first time we saw ceviche being made we were a bit amazed by the simplicity and the flavours that were involved, so we decided we should give it a try. For us, ceviche works great as an appetizer or starter to the meal, as the tanginess and the zing of the lime combine with the light touch of the seafood can get things started for heavier meals. We decided to use shrimps in our ceviche, but you can also use fresh fish, emphasis on the fresh part – you won’t be cooking with heat so this part is important in order to avoid any intestinal problems after. 


Let’s talk ingredients:  

  • 12 medium shrimps, 
  • fennel, 
  • radicchio, 
  • avocado, 
  • coconut, 
  • salt, pepper, 
  • the juice of 2 limes 
  • 1 lemon.


We boiled the shrimp for 2 minutes then popped them in ice water, but you can choose to use them raw. We just wanted to play it safe on our 1st try on the ceviche. So, clean, devein and remove the shrimp tails and put them in the citrus juice for about 45 minutes, alongside the salt, pepper and the thinly sliced fennel. And that’s it, nothing more.


Put some finely sliced radicchio on the bottom of a glass, some fennel and avocado on top, and 3 shrimps per portion. Use 4-5 tbs. of the lemon juice for each glass and mix it with the water from 1 coconut – it will just add a hint of flavor without taking the dish off course. Pour some juice on in each glass and you’re ready to impress your party guests. A great addition to the dish could be a touch of heat from a chili or some fresh coriander leaves, take your pick.


We paired the ceviche with some well chilled Sauvignon Blanc that worked great with its mineral, citrusy, grassy touches.  

Enjoy,

Wednesday, January 29, 2014

Cauliflower with Jerusalem Artichoke Puree and Pickled Okra | You've Got Meal!


Vegetarians out there, rejoice! You might make a meat free man out of me yet, but you still have a long way to go regarding dairy. This vegetarian combo was both light and fulfilling, which I can’t say about a lot of meatless meals I had. You can make this recipe vegan all the way, but removing butter from the puree wasn’t really an option for me.


You’re going to need: 
  • 1 small cauliflower, broken into small florets, 
  • cumin seeds, 
  • chick peas, 
  • parsley, 
  • olive oil, 
  • equal quantities of Jerusalem artichoke and potatoes (about 350 grams each), 
  • butter, 
  • salt, pepper
  • (optional) goat cheese.


  1. Mix the cauliflower florets with the cumin seeds, salt, pepper and olive oil and cook in the medium hot oven for 20 minutes. 
  2. Add in a handful of chickpeas from a can and cook for another 5 minutes, just enough to heat through – careful here, the more you let the beans in, the drier they will get. 
  3. Put the cauliflower and chickpeas on a plate and sprinkle goat cheese and chopped parsley on top.


  1. For the puree, clean/peel the Jerusalem artichokes and potatoes and boil them in some salted water. 
  2. When boiled through, remove the water, add some more salt, a dash of pepper and about 50-75 grams of butter. 
  3. Use a fork or a masher to make your mash – or a food processor.  


What can I say about the pickled okra, except the fact is awesome and it goes really well with the vegetarian feel of the whole dish. What’s not to love: okra pickled in apple vinegar with sugar, celery, bay leaves and lots of chili and just a hint of garlic.


Enjoy,

Thursday, January 23, 2014

Pink Grapefruit Pancakes | You've Got Meal!


Weekend breakfast is probably my favorite meal of the week. I wouldn't actually call breakfast what we have during the week ( a fruit, a yogurt or a healthy juice to name the best choices) so, for me, having a nice breakfast with hubby during the weekends it feels like a special occasion. I LOVE my eggs and bacon or any other egg breakfast for that matter, but I also appreciate a sweet meal from time to time.


Am I the only one that finds making pancakes so relaxing?

This last weekend I woke up with one thought in my mind: I have to make a breakfast that included some fruit and I want pancakes. The only fruit we had were pink grapefruits. I love the recipe for buttermilk pancakes, but I only had some Greek yogurt, so I decided to try a version with grapefruit juice and Greek yogurt.


I used:

  • 3/4 to 1 cup flour
  • 1 tbsp baking powder
  • 1/2 tsp salt
  • 1/4 cup brown sugar
  • 1/2 cup grapefruit juice
  • 1 egg
  • 150 ml Greek yogurt (5 oz)
  • 1 drop red food coloring (optional)
 

Making the batter:
  1. Stir the yogurt just for a bit to make it creamier.
  2. Pour the egg on top of the Greek yogurt and mix well, until the egg is beaten and perfectly incorporated into the yogurt.
  3. In the same bowl, add the grapefruit juice and mix.
  4. At this point you can add the dry ingredients one at a time and you can even use a hand mixer to get the job done faster.

 Method:
  1. Cut some tiny pieces of grapefruit and put aside.
  2. Brush a skillet with oil / spray it with cooking spray and when the oil is heated pour with a small ladle the batter to form one pancake at a time.
  3. Add some pieces of grapefruit  on top of the pancakes before turning it on the other side.
  4. Serve with powder sugar for a nice twist.


Enjoy,

Sunday, November 10, 2013

Beer Bread- Simple Recipe | You've Got Meal!


For some time, I've been saving on Pinterest some recipes for simple, beer bread. I never tried it before, although I am a big fan of homemade bread that does not require yeast and a lot of time. I was really curious to see if you could identify the taste of beer in the bread. The outcome was worth it!


What is great about the recipe is that it requires just a few ingredients, it is super easy to make and it is not time-consuming. The preparation it takes less than 15 minutes and after baking you have a great bread you made and of course, a lovely homemade bread smell for your kitchen. Who does not find that comforting, especially now that winter is knocking on our door?


Ingredients:

  • 350 g all purpose flour
  • 50 g rye flour (optional, or you can use 400 g ap flour )
  • 125 g sugar
  • 330 ml beer
  • 2 tbsp melted butter


When I started making the dough I realized I didn't have enough flour so I also used some rye flour, but you can use all purpose flour only.

In a large bowl, mix the flour with the beer and the sugar. The resulting dough will be sticky. Place it in a buttered loaf tin or use some baking sheet if it makes you feel safer. I used baking sheet and it turned out ok. Place it in the preheated oven and bake for 45 minutes.


After 45 minutes take it out and pour the melted butter on top and return it in the oven for another 5 to 10 minutes.

My oven has some issues, being old and grumpy, and it tends to burn in the back, but that only affected the aesthetics of it all, the taste being amazing.

No, it does not taste like beer :), but rather like sugar. It is a bread more on the sweet side, perfect for some butter and jam. I have to say I will try it with less sugar and maybe some added salt and other flavors and keep you posted. Considering the minimum effort and the total cost of this bread it is a recipe to try and to save, the bread actually makes itself.


Enjoy,
Related Posts Plugin for WordPress, Blogger...