Pin It button on image hover
Showing posts with label blog. Show all posts

Thursday, February 27, 2014

Mussels in White Wine Sauce (Moules Mariniere) | You've Got Meal!


Mussels are one of our favorite choices when we want to cook seafood in the Youvegotmeal! kitchen, and for obvious reasons. They’re delicious, light, easy to cook and look great at the table. 
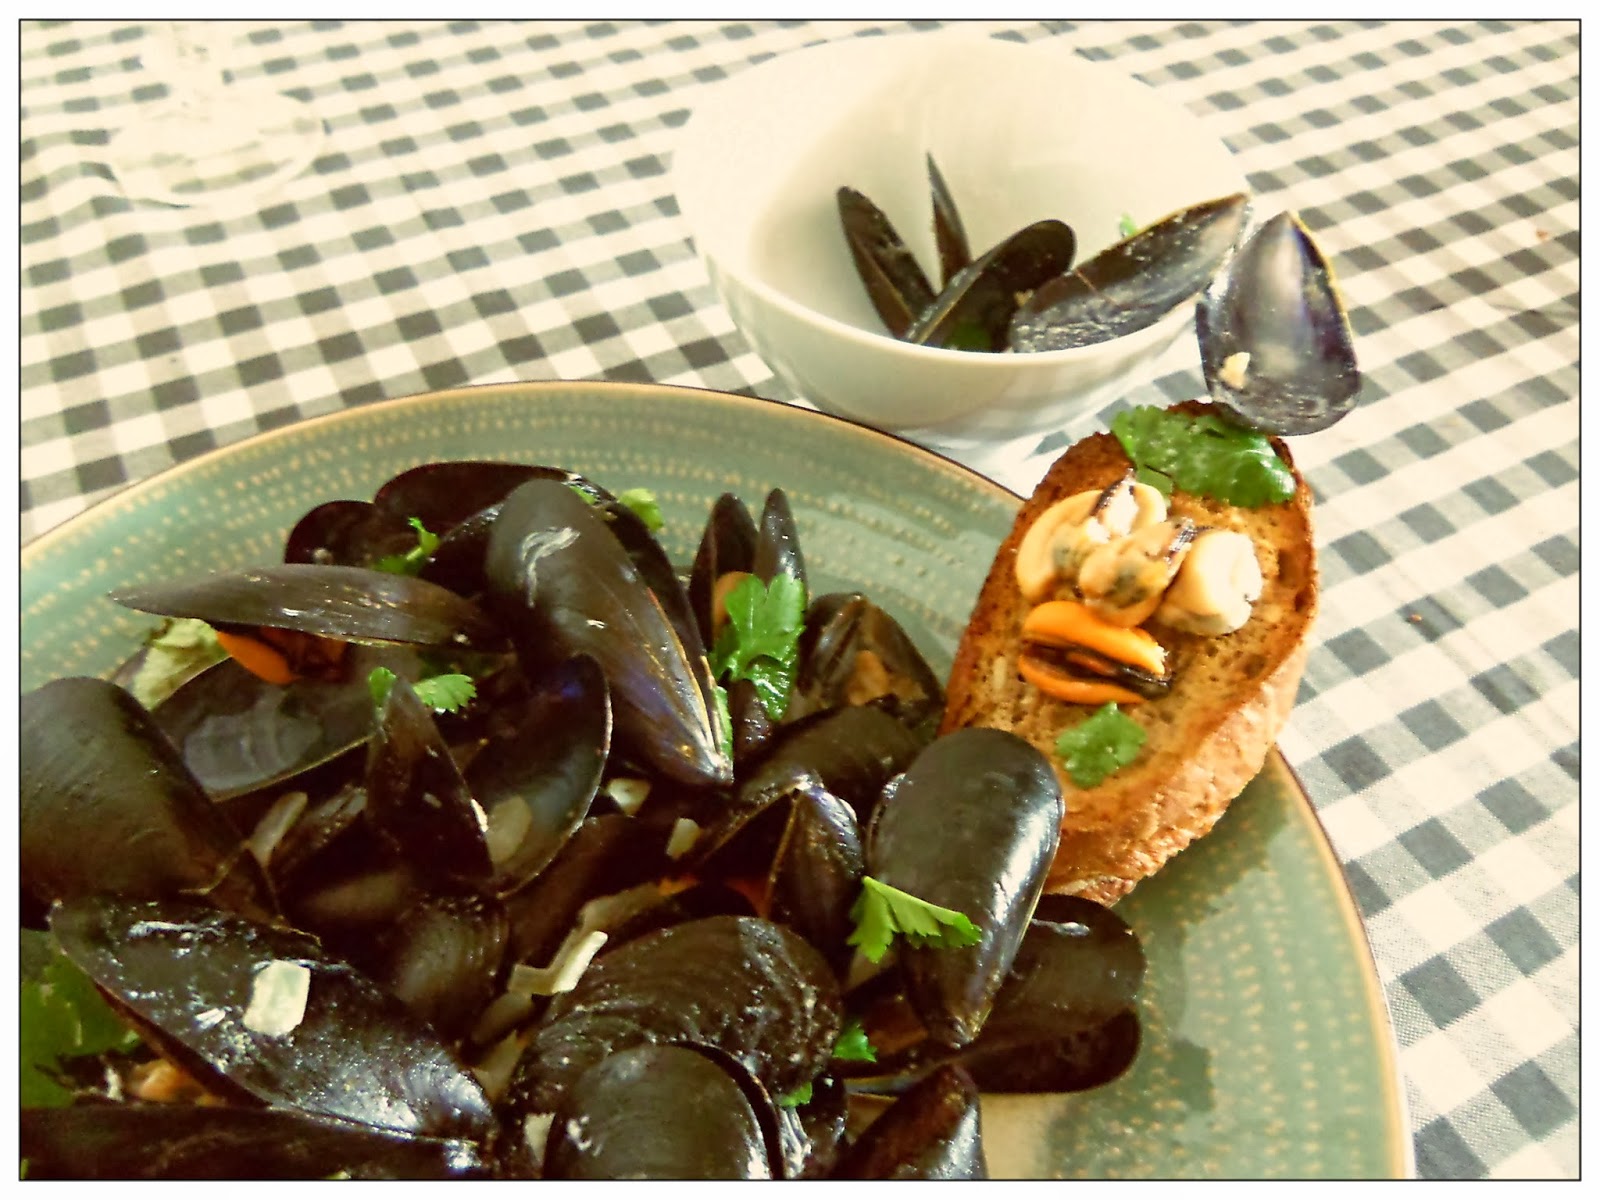

Unfortunately, when dealing with fresh mussels the most difficult part is cleaning them, but you can’t skip this part, especially when you’re using them whole. Scrub the mussels with a wire wool and make sure to remove the “mustache” or “beard” of the clam, meaning the algae that sometimes hangs from inside the mollusk.


 Cooking the mussels in some white wine sauce is one of the classic ways to do it and I’m sure you can find dozens, if not hundreds, of variations of this dish on-line. The concept is a simple one, and we made best with ingredients at hand:

  • 1,5 kg of whole mussels, 
  • 1 medium onion, 
  • 3-4 garlic cloves, 
  • some nice dry white wine, 
  • coriander, 
  • parsley, 
  • salt, pepper,
  • olive oil, 
  • cooking cream


  • First of all separate the leaves and stalks of your greens. The idea is to use the leaves, that are more tender in the end of the cooking process and the stalks from the beginning. 
  • Bind the stalks of coriander and parsley with some string in order to easily remove it later – you can also add some lemon thyme springs to the coriander and parsley stalks and create a very nice bouquet garni. 
  • Next, start  cooking the finely diced onion and garlic cloves in the hot oil, on medium heat, for 3 minutes, with the stalks in. 


  • Add the wine, about 100-150 ml, bring to a boil, kick the heat up and pop the mussels in. 
  • Cover the pan and let the clams open in the wine steam for 4-5 minutes- throw away any mussels that don’t open. 
  • Remove the top, add some cooking cream for color (about 50 ml) with the parsley and coriander leaves. 


Serve the mussels with some crunchy bread and the rest of your white wine.


Enjoy,

Wednesday, January 29, 2014

Cauliflower with Jerusalem Artichoke Puree and Pickled Okra | You've Got Meal!


Vegetarians out there, rejoice! You might make a meat free man out of me yet, but you still have a long way to go regarding dairy. This vegetarian combo was both light and fulfilling, which I can’t say about a lot of meatless meals I had. You can make this recipe vegan all the way, but removing butter from the puree wasn’t really an option for me.


You’re going to need: 
  • 1 small cauliflower, broken into small florets, 
  • cumin seeds, 
  • chick peas, 
  • parsley, 
  • olive oil, 
  • equal quantities of Jerusalem artichoke and potatoes (about 350 grams each), 
  • butter, 
  • salt, pepper
  • (optional) goat cheese.


  1. Mix the cauliflower florets with the cumin seeds, salt, pepper and olive oil and cook in the medium hot oven for 20 minutes. 
  2. Add in a handful of chickpeas from a can and cook for another 5 minutes, just enough to heat through – careful here, the more you let the beans in, the drier they will get. 
  3. Put the cauliflower and chickpeas on a plate and sprinkle goat cheese and chopped parsley on top.


  1. For the puree, clean/peel the Jerusalem artichokes and potatoes and boil them in some salted water. 
  2. When boiled through, remove the water, add some more salt, a dash of pepper and about 50-75 grams of butter. 
  3. Use a fork or a masher to make your mash – or a food processor.  


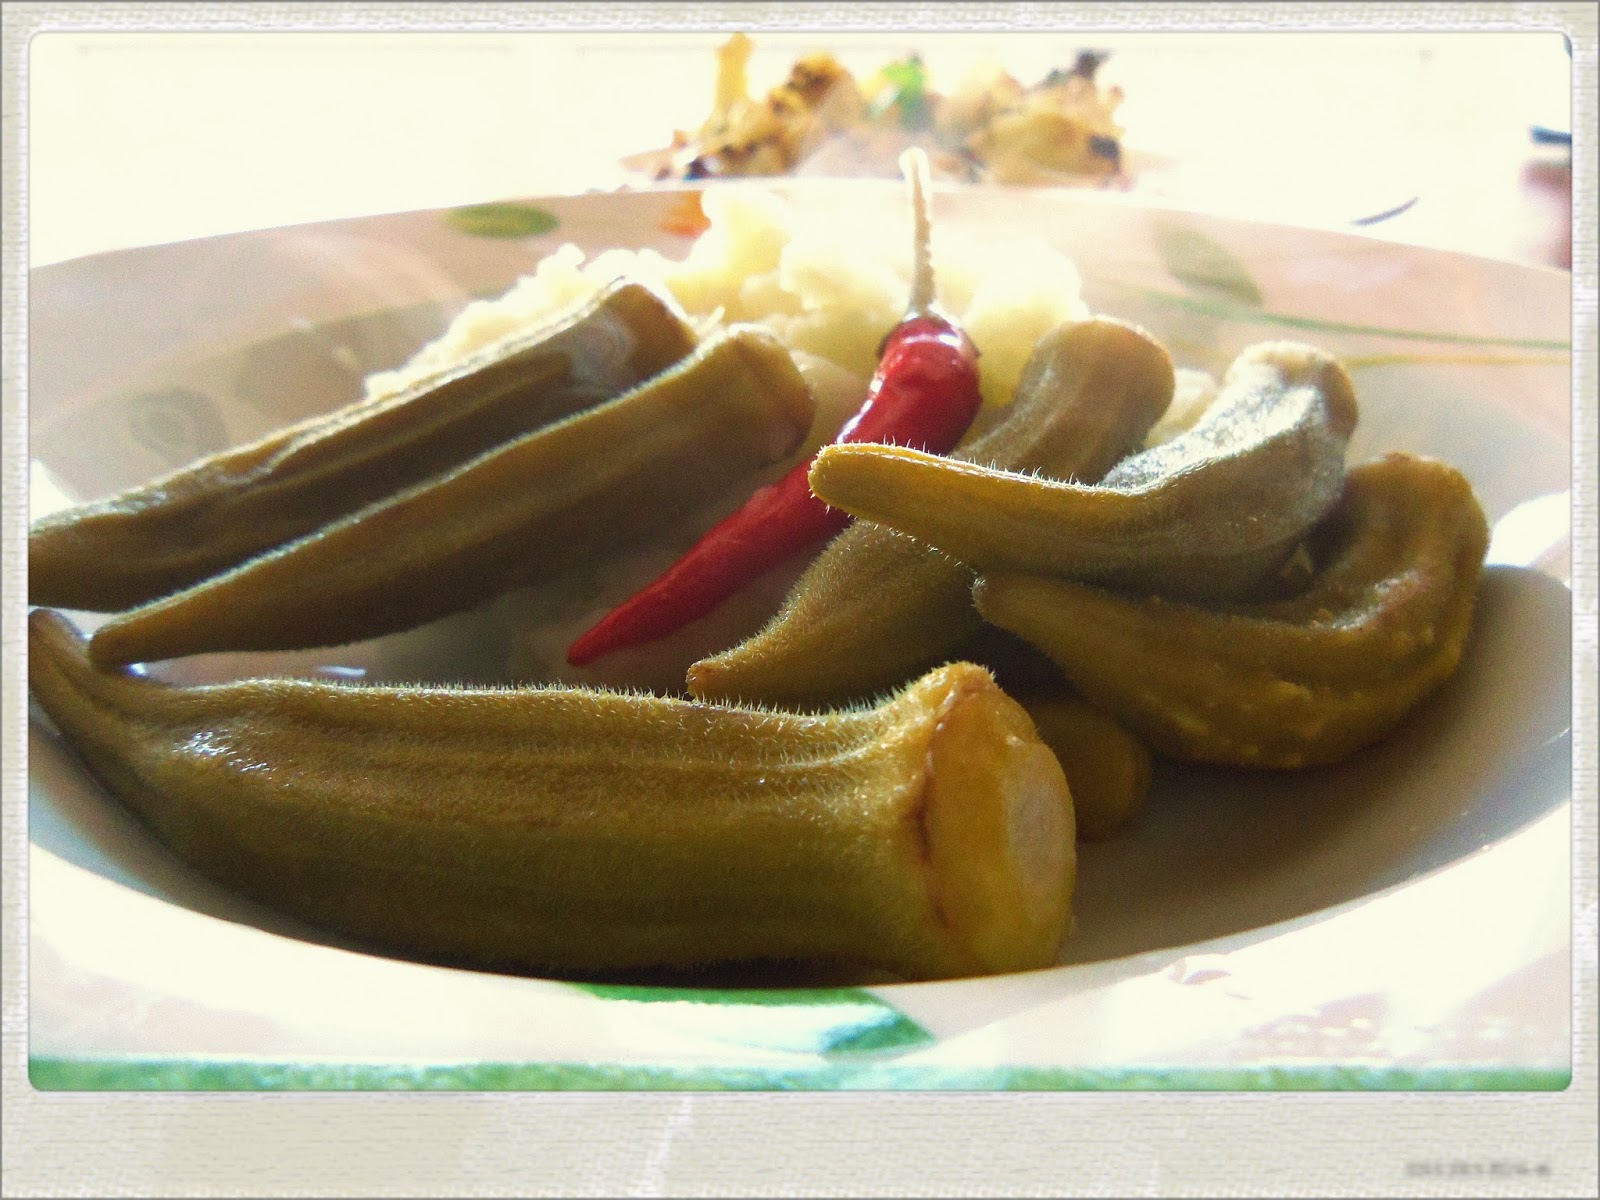
What can I say about the pickled okra, except the fact is awesome and it goes really well with the vegetarian feel of the whole dish. What’s not to love: okra pickled in apple vinegar with sugar, celery, bay leaves and lots of chili and just a hint of garlic.


Enjoy,

Wednesday, November 13, 2013

Noodle Soup with River Bass | You've Got Meal!


River bass is one of my favorite fish. The meaty, lean, white, subtle fish is very versatile and can be cooked in so many ways that is too bad that I don’t get my hands on bass very often.


And considering the fact that Mrs. G’s name day was coming, I decided to turn this fabulous fish into an Asian style noodle soup. To say she loves those is an understatement, and I would really like to see what she would do in a Ramen restaurant.


Cooking this soup is super simple and it’s composed of 3 parts: the fish, the stir fry, the boiled ingredients and the broth (the base of the soup). This feels like actually building the soup from different parts, the ingredients for each being: green onions, carrots, chili, garlic, ginger, sugar, soy sauce and fish sauce  (1 teaspoon each for the last 3) for the stir fry; broccoli and instant noodles to boil; cardamom, allspice, star anise, pepper, salt for the broth.


Start of by  gutting and cleaning the fish. Next, take all the ingredients for the broth and put them in a tea satchel. Place it in salted water and boil until the liquid has been infused by the spices. Next, massage the fish with some salt and a hint of 5 spice and place it in the oven, high heat, on a rack that has a tray under. Depending on the size of the fish, it will take to cook from 8-15 minutes.


Remove the fish from the oven and set aside. The next 2 parts take literally 2 minutes. At  the same time, boil the broccoli in the broth and stir fry the vegetables in a wok, in a little peanut oil .


Time to plate your soup. First, place the vegetables from the wok, then the instant noodles (that’s the kind I used here, but you can choose a different kind- just be careful with the ones that take longer to cook – boil them in the infused broth before adding them to the soup ), soup (up to 90% of the bowl), pieces of broccoli and flaked pieces of bass. Let the noodles cook- it takes 2-3 minutes, they will absorb a fair amount of liquid so feel free to add more broth to the soup if you feel like necessary.


Now, I’m gonna go and say here that the resulting dish was a comforting, savory soup. Thing is, in order to fully demonstrate this would be to actually show you Mrs. G just munching it away in under a minute (but she hid the recording). Like I said before, she LOVES her noodle soups.

Enjoy,

Monday, October 21, 2013

Rice-filled Pumpkin | You've Got Meal!


It took for us to make our own blog in order to start cooking pumpkin, but the wait was worth. Growing up the only way we actually ate pumpkin was in (a very nice) pie, that, I have to admit, is one of the best smelling dishes I’ve ever seen. But bringing this seasonal ingredient to a salty dish was something I wanted to do for a very long time and I started with the stew posted last time. This time, the dish is a little flashier and it can certainly make you feel badass in front of your guests. Honestly, bringing a neat looking pumpkin filled with a spicy, creamy rice to the table has to score some points with the company you keep. 


Let’s start of with the ingredients that I used for filling a pumpkin about 1,3-1,5 kilo pumpkin: 
about half a cup of risotto rice, 
1 medium onion, 
3-4 cloves of garlic, 
1 medium beet, 
4 tbsp capers 
1 chilli, 
cinnamon, ground cumin and cardamom, 
salt, pepper, 
75 grams of butter, 
olive oil and 
100 grams of grated Parmesan. 


And of course the above said pumpkin and its insides. A couple of things about the ingredients: I decided to fill the pumpkin with a risotto style rice and, also, add cheese to this combination, but you can easily turn this recipe in a vegetarian star by using soy or coconut milk/cream, in which case a slightly more oriental touch of aromas could be in case. For the pumpkin, pick a healthy, sturdy one, with no visible marks or soft areas – those can give you trouble in the oven. You need to remove the insides of the “beast” before beginning, but don’t throw it away, you’ll integrate it in the rice. Also, make sure you don’t throw the top of the pumpkin, you’ll use it later.


  • To start things of, cook your beet in the oven. First wash the root vegetable, pat it dry, place it on a piece of tin foil, splash a small amount of olive oil on the beet, some salt then close the foil on the vegetable, creating a wrapper that still holds enough room for the steam to build in there. The cooking time depends on the size of the beet, in this case it took 45 minutes. The vegetable is done when you can easily stick your knife through it. When the beet is done, remove the foil, let it cool down then finely cut it -  set aside. 
  • Next, start making your risotto by cooking the finely diced onion and garlic for a bout 4 minutes on high heat, in some olive oil. Next add the beet,  the capers and the pumpkin insides (you won’t be able to use all of it, so keep around 1 cup of the finely diced pumpkin “entrails”). Cook the vegetables for another 3 -5 minutes. Add in the rice and all the spices and cook them for a minute before adding the liquid – use only stock or add wine, if you feel like it (1 part wine to 3 parts stock, make sure you simmer the wine down before adding the rest of the liquid).You need to cook the rice to about 90% done, so make sure you taste your rice -  it should take around 20 minutes on a medium high heat. 
  • Remove the rice from the stove, add in the butter and mix things. 
  • Next, start filling the pumpkin with the creamy rice – add a couple of tbs. of rice and top those with a heavy layer of cheese. Keep going until you’re almost at the top -  don’t completely fill the pumpkin up t the top, it will need some space to bubble up when the insides  start cooking. 
  • Place top on the pumpkin and put in an oven tray, with some oven proof paper, on medium heat and cook for about 30 minutes. 
  • You can choose to serve the pumpkin whole and cut it at the table or slice it yourself before plating, either way make sure to add some green to the dish with some chopped  parsley or oregano or basil or thyme or mint. Pick one already. And then eat, you’ll like it. 


Oh, and I can’t end this recipe without making this point: you can always use bacon in cooking the rice, just saying, no pressure……

Friday, September 20, 2013

Thassos, Greece- Day 1

You might have noticed that we have been a bit MIA from the blog, but if you follow us on Instagram you would know by now that we went on vacation.
This year, for our rather late time off we chose to go to Greece because it is really convenient for us and we’ve been there 2 more time and had a great time. Greece is a nice choice because every island is different and offers a special experience.
A lot of tiny fish in port Keramouti
This time around we went to Thassos for 7 days. We didn’t know what to expect, but the main thing we wanted was a great beach with a lot of sand and clear water. We got that and more.  We stayed in a villa in Golden Beach which proved to be a great choice, it might be the best beach in Thassos.
In our first day, after a long road we arrived in Keramouti, and then to Thassos, in Limenas Port by ferry.
Locals fishing in Keramouti
This man did not seem very pleased with his catch, but I found the fish interesting

After a 30 minute bus ride we arrived in Golden Beach.  While we were in the bus we go to see other villages that we visited later on. At first, we were kind of confused because the bus kept on going up in the mountains for a long time  before we could actually spot the sea.
It's like they drive the ferry
Arriving in Limenas
This is actually one of the main attractions of the island: it has great mountains as well as great beaches. You can go hiking, the view leaves you breathless, you can stay all day at the beach or you can walk around the narrow-street villages.
We were excited to try the water in our first day that we changed as soon as we got in the room and went to the beach.  It was already around 2 o’clock and we were exhausted from the whole trip, but we had to jump in the water. I have to say, because we chose the middle of September the fear of  a cold snap followed us  all the time, although everybody says September is great for Greece.
Spotting the sea through the pine trees
Perfect view for our first day
Later on, a restaurant that was beautifully placed on the top of a cliff caught our eye, Vigli.  It was right next to the beach and the view was amazing, especially for a pair of beach-obsessed people like us.
Mr. G had to try the fresh fish, tsipura, which is basically the Greek name for dorado fish. Way to excited we forgot to take a photo of it. I had shrimp scampi, which was ok, shrimp on top of spaghetti, with tomatoes and feta cheese,  but I have to say that for an island, they could offer a little more when it comes to fresh fish and sea food.
Shrimp Scampi
After this late lunch, we came back to our sunbeds and enjoyed the rest of  the day with the sand at our feet.  Also, we kinda fell asleep. Not exactly what the doctor prescribed, but we were pretty tired and apparently really relaxed in the end.

Keep on visiting for day 2.

xoxo,
Related Posts Plugin for WordPress, Blogger...