Pin It button on image hover
Showing posts with label zucchini. Show all posts

Thursday, February 6, 2014

Homemade Pizza- 3 Amazing Versions + Pizza Dough Recipe | You've Got Meal!


I honestly think that fast food has gained a far too bad reputation than it deserves. Pizza, hamburgers, kebabs, fries, all these food industry bad boys can be redeemed with just a little ingenuity and effort into some great tasting healthy meals. From all the choices, pizza is my favorite for cooking at home. It’s simple, delicious, let’s you combine a lot of incredible flavors and, if you make your own dough, it gives you that rewarding feeling that you get when baking.

In this case, I used the recipe for the dough from the Jamie Oliver site, except I halved the quantities he suggested, meaning I used:
  • 500 grams of 000 flour, 
  • 7 grams of dried yeast (that’s basically a small dose that you can buy individually), 
  • 1 tbs. sugar, 
  • 1 tsp. fine salt, 
  • 2 tbs. olive oil, 
  • 325 ml of warm water. 


  1. Sieve the flour in a large, deep pan (I tried doing this on a work surface but I ended up making a giant mess in the kitchen), add the salt. 
  2. In a separate bowl, mix the yeast with the sugar, olive oil and the warm water. 
  3. After leaving the wet mixture sit for a couple of minutes, pour it in a well in the middle of the flour and start bringing in the sides into the middle, gradually. 
  4. Use your hands to knead the dough until you get a nice, smooth and elastic result. 
  5. Next, put the dough in a well floured bowl, cover it with a damp cloth and let it rest in a warm room without a draft source for an hour – it should double in size. 
  6. The resulting dough was enough for 3 pizzas with a diameter of 30 cm with a thin base.


The 1st one was with: pancetta, salami, zucchini, broccoli, as seen above. The pancetta was amazing especially when we curled it on the dough and it became just a bit crispy. The broccoli alongside the zucchini made this pizza so special that it was Mrs. G's favourite. Plus, it is healthier than most. I have to mention the broccoli stays just a bit crunchy and that is perfect and you have to use fresh broccoli, as the frozen one might leave some water and make the pizza more runny.  

Mean while, prepare your ingredients for the pizzas. For all 3 pizzas we used some fresh Mozzarella that we crumbled on top. Also, I started by massaging the rolled pizza dough with a very small amount of olive oil (just enough to give it some shine) and relatively thick tomato paste (also used some of the home made paste that we made for this recipe). The cooking time in a hot oven (200 Celsius) was around 10-11 minutes. As another advice from our pizza adventure be careful with the Gorgonzola – don’t use too much and place it near the center of the dough as it tends to melt a lot and get runny. The same rule applies only partially for the fresh mozzarella as it tends to hold its own better, but, again, don’t overdo it, especially near the edges. 


The 2nd one: salami, Gorgonzola, zucchini, mushrooms, onion, as seen above. This one had a classic taste, a nice tangy hint from the Gorgonzola and you can't possible not love mushroom and onion together on a pizza.  


The 3rd one: pancetta, broccoli, zucchini, olives, onions and artichoke hearts, as seen above. Basically the one where I went all out, a true veggie delight on a pancetta bed and topped with cheesy, Mozzarella goodness. 

Super easy, super fast, super fun and super delicious food. And the next time you start taking a look at those menus from your neighborhood pizza place keep in mind that you can take them out of business any time with this kind of tiny effort. Ok, might sound worse than it actually is, a slight exaggeration there, but you get the idea.


Enjoy,


Sunday, January 26, 2014

Cod, Couscous and Zucchini | You've Got Meal!


Let me assure you right from the beginning that there is more to this dish than an enumeration of the ingredients listed above. The fish works great with the fluffy, flavored couscous, the mellow zucchinis elevate the combo and a harissa-yoghurt sauce brings everything together. 

So let’s talk ingredients: 
  • a couple pieces of cod (we used some frozen ones), 
  • about 150 grams of couscous,  
  • sun dried tomatoes, 
  • spring onions, 
  • 2-3 garlic cloves, 
  • 2 medium zucchinis, 
  • 1 lemon, 
  • Greek yogurt,
  • Harissa sauce.


  1. Start of by cooking the zucchini: cut them in medium sized chunks, give them a good splash of olive oil, a pinch of salt and pepper and place them in an oven proof pan, with 2 halves of a lemon. Cook in the preheated oven, medium-high heat for around 20 minutes. Taste from time to time, just to make sure you don’t overcook the vegetables.
  2. Next, the couscous. I think that the only thing simpler than cooking couscous is eating cereals for breakfast. Put the couscous in a bowl, pour hot water over it until in covers it for about 1 cm. Use some cling film to cover the bowl and wait until all the liquid is absorbed. Use a fork to fluff the couscous. Mix in some finely chopped sun dried tomatoes with a couple tbs. of their oil, crushed garlic and spring onions.
  3. You can cook the cod any way you feel like it: grilled, seared, in the oven. We rolled the cod pieces in some cornmeal crust and then we fried the fish in some olive oil until it got a beautiful golden crust.
  4. Plate everything, including  a healthy amount of yoghurt and Harissa sauce next to the fish and veggies. Grab your favorite salad mix (indulge yourself with that little cheat) and place a nice hand of the crunchy leaves, sprinkle a splash of the baked lemon juice on top. Be careful though, the juice gets a fair amount of bitterness from the zest when cooked, so it may be a little bit overwhelming. 


Trust, you can’t go wrong with this combo, it has everything you need – fish, veggies, couscous and a hell of a kick from the baked lemon juice. You can choose to replace the fish with another type, fresh herring or mackerel. Also, if you can’t get Harrisa sauce, just make your own, boil down some passata juice mixed with tomato concentrate, hot pepper jam, cumin, all spice, sugar, a touch of rose water and saffron. Or whatever  condiments you feel like having in your sauce – it’s just that easy.

Enjoy,

Monday, September 2, 2013

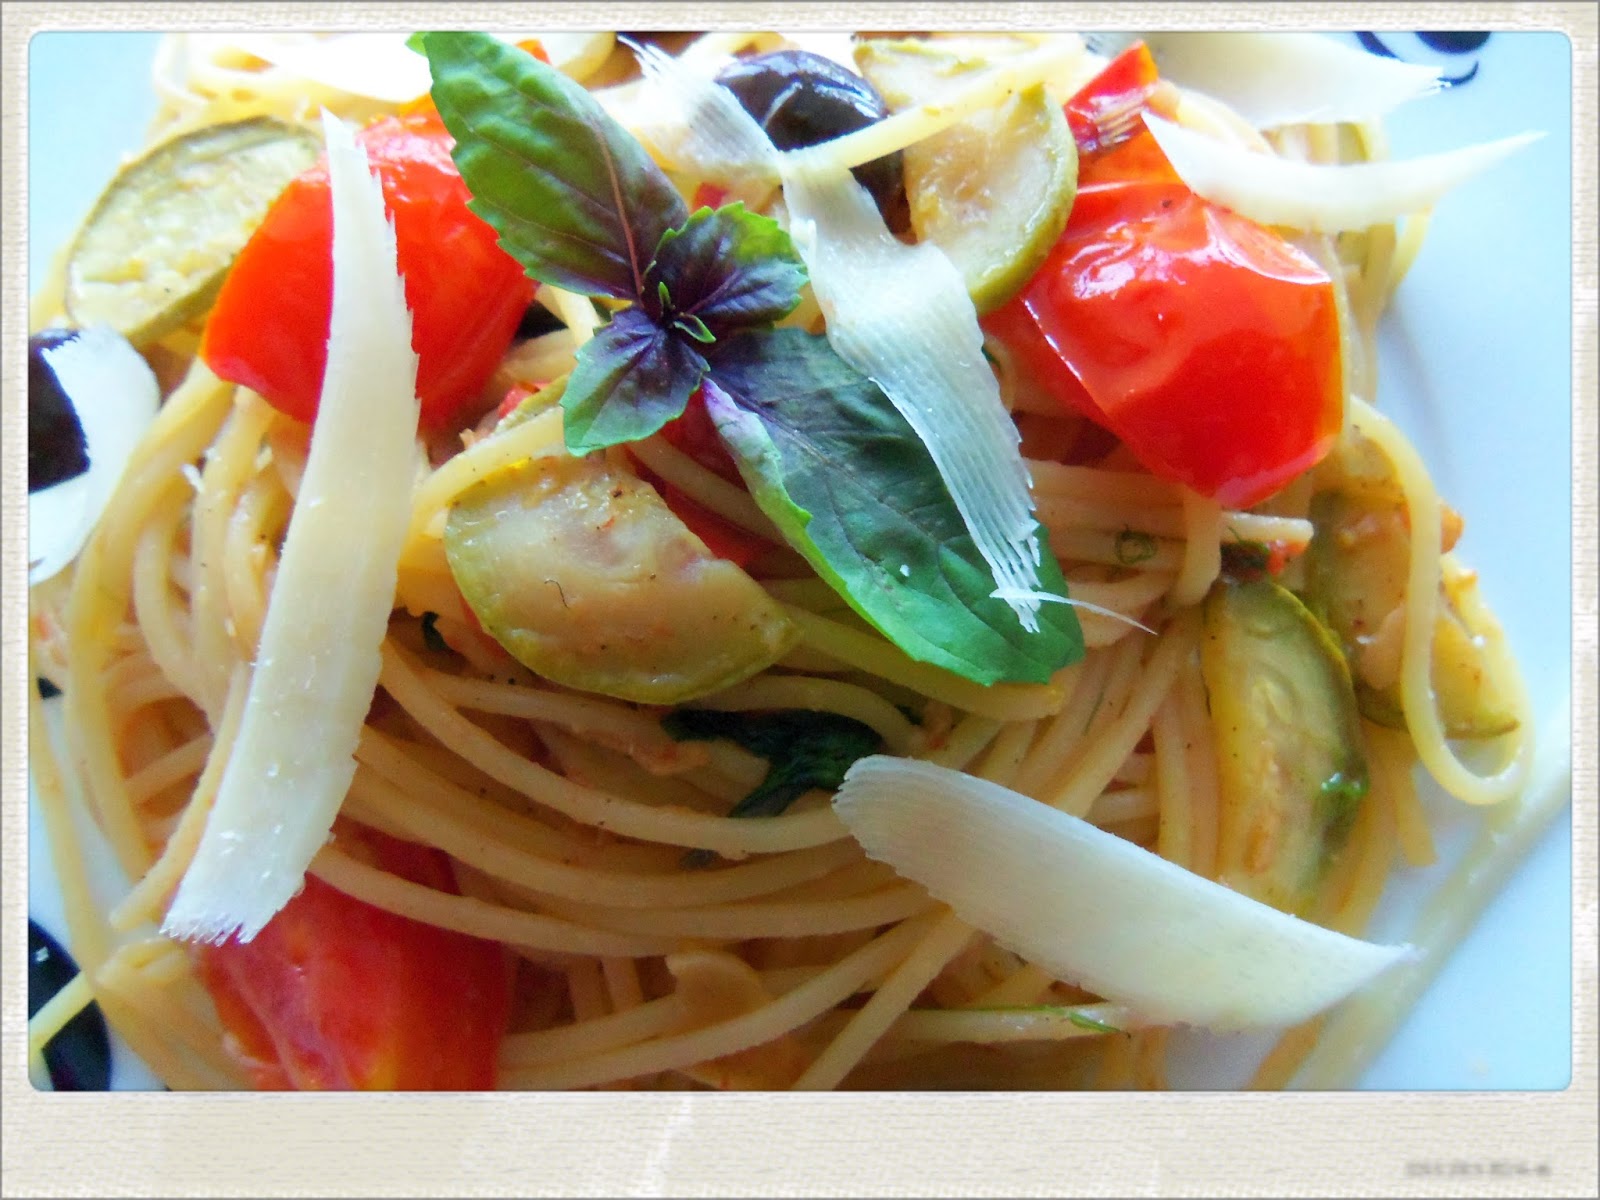
Fennel and Zucchini Pasta | You've Got Meal!


Lately, I’ve been browsing different foodies on Instagram, trying to see what is exactly trending in other people’s food posts. The thing is, except the consecrated restaurants or the users who have the possibility to access a large variety of (exotic) food, the biggest thing seems to be #vegan or #vegetarian.


 Honestly, just take a picture of a nice apple and strap some of those tags on it and the likes will start popping. I definitely support veggie lovers worldwide, but this is a bit ridiculous. So, instead of just taking pictures of chopped fruits in a bowl and call that dinner, I decided to make something of a vegetarian pasta recipe, using two of my best friends: fennel and zucchini.

Saturday, June 29, 2013

Goat-Cheese Stuffed Zucchini Blossoms


Because we absolutely loved our first time eating blossoms, we had to try it again as soon as we could.


I love this time of the year, the vegetables are getting better and better, their prices are dropping, and you can find really good produce in the farmer markets. One of the most abundant vegetables out there is the humble zucchini, that you can get for ridiculous low prices right now. 


Unfortunately, using this vegetable on an everyday scale isn’t really an option, so to spice things up, we also like to cook its blossoms. We showed earlier a ricotta cheese recipe, and we decided to make a goat cheese version, a recipe with a little bit more personality.


So, for 7 flowers, we used:

200 g of goat cheese (use a soft one, that you can work into a paste), 
2 green onions, 
2 tbs of chopped fennel leaves, 
1tsp nutmeg, 
1 chilli
flour and sparkling water for the batter

First and foremost, prepare the blossoms by (gently) removing each one’s pestle, which tastes terrible. No, really, they should have an emoticon for that, it is one of the most bitter things we’ve ever tasted. Oh, and check for ants, they tend to roam inside the flowers as well (or don’t, think of them as extra crunch J). 

Mix, the cheese, finely sliced onions, the chilli, fennel and nutmeg and fill the flowers, making sure the composition is well sealed inside. 


For the batter, you need to create a mix that has a slightly thicker density that a pancake one. Dip the filled blossoms in the batter, making sure they are well covered, then fry them in hot vegetable oil until they get a light brown color. 

For an extra visual effect, make sure you don’t cover the flowers with too much batter, so, when fried, the blossom will retain some of its original color (otherwise all you’ll see will be fried batter). 

Feel free to sprinkle some lemon juice on the flowers or any type of tangy vinaigrette that can bring some balance.


Enjoy!

Monday, June 24, 2013

Fried Ricotta-Stuffed Zucchini Blossoms


My parents went to my granny's house this weekend and brought us some zuchini blossoms. To me honest it is the first time we tried preparing these, although we wanted to do it for a long time.

We chose a fresh recipe, one that will also be simple, just for us to understand the taste and the possibilities of these blossoms.


We had six blossoms with the tiny zucchinis attached. First, although we were quite scared of how delicate they seemed, we took out the pestles from each flower,  and washed them.


The filling:

200-250 g Ricotta cheese
1/2 bunch of mint
30 g Parmesan
chopped dry chipotle to taste
salt and pepper
Just mix all the ingredients in a bowl.

Because we used Ricotta the filling turned out pretty soft, so we found that the best way to fill the blossoms was with some baking sheet rolled into a piping bag with the end cut off. Of course, you could use a piping bag or even a teaspoon if you are the handy kind.


In order to fry them we used a simple batter made of 1/2 cup of flour and 1/2 cup of sparkling water. You can always add more water  or flour if necessary. The point is that the batter should be thick enough to stick to your finger when you dip it in, but thin enough to drip slowly.


After dipping them in the batter, fry them in vegetable oil until they turn golden and crispy, about 3 minutes on each side. We served them with lemon juice on top, this dish could go with a sour note, so you could prepare a vinaigrette or a salsa.

This was a really nice suprise, we must say. The filling was very fresh and light and the blossoms are definitely a seasonal ingredient that we will look for from now on.

Oh...and the tiny zucchinis attached to them were exceptional. Now, that is something worth mentioning.


Enjoy,
Mrs. G.
Related Posts Plugin for WordPress, Blogger...