Pin It button on image hover
Showing posts with label light. Show all posts

Tuesday, February 18, 2014

Chicory, Green Apple and Mozzarella Salad | You've Got Meal!

Simple and healthy croutons salad idea. A recipe using endives, apple and Mozzarella. Perfect lunch/light dinner salad or as a starter.


Can’t believe that it took us so long to actually make a post about this dish. We’ve been making it for the past couple of years and we got the recipe from either Jamie Oliver or Good Food, can’t quite remember who we have to give credit.


Nonetheless, it’s a great salad, full of crunch, flavor, and it’s so light that you can use it as a starter to a longer meal. 

You’ll need:
  • fresh mozzarella (for 2 generous portions we used 2 balls with roughly 150 grams each), 
  • 1 rather tart green apple (Granny Smith), 
  • 2 medium sized chicories (or endives, if you know them by that name), 
  • a couple of slices of bread, 
  • salt, pepper, 
  • olive oil, lemon juice. 


  1. Just roughly chop the endives – by the way, the salad looks better if you can find and use both red and yellow - tip types, and cube the bread. 
  2. Heat up some olive oil on medium high heat and stir-fry the chicories for 2-3 minutes, remove from the pan and set aside. 
  3. Next, in the same pan add the bread croutons, splash a small amount of olive oil on top and cook them until they are slightly crunchy and browned all sides.
  4.  Meanwhile, cut or break the cheese in any way you like, dice about 1 quarter of the apple per portion and add it to the mozzarella. 
  5. Make a vinaigrette of 1 part lemon juice/ 3 part olive oil, salt, pepper and pour it over the endives, apple and mozzarella. After that, pop in the croutons and mix well.


The next part of the recipe is optional, but we definitely recommended it: open your very well chilled bottle of Prosecco, pour yourself a tall glass of the bubbly and enjoy this great salad that will make you love it at first taste.


Cheers,

Wednesday, January 15, 2014

Tuna and Chili Pasta | You've Got Meal!

No Heat Pasta Sauce * Simple Pasta * Tuna Pasta


This is probably one of the simplest recipe on our blog and it is a great way to use an ordinary can of tuna. Pasta dishes are usually great fast solutions for weekday dinners or home made lunches in a hurry. This one is even more convenient because it only takes as much time as the pasta needs to boil and actually the skill to boil water is the only one required. :)


The final taste is quite complex, rich from the tuna, balanced by the lemon, the parsley give it the freshness and the chili just the kick it needed. The only tip I would give, especially since the dish is really affordable, is to use a nice quality tuna flakes can, being the main ingredient it really makes the difference.


Ingredients:
  • 250 g store-bought spaghetti
  • 1 185 g tuna can 
  • 1 small red onion (or half of a big one)
  • 1 hot pepper ( 1 used 3 tiny chilies)
  • 2 garlic cloves
  • 1 tbsp capers, drained
  • 1/2 handful of parsley
  • 2 tbsp oil
  • 2 tbsp lemon juice


  1. Pour the pasta in boiling water with salt and a drizzle of olive oil (for extra shine).
  2. Cook the pasta according to the package instructions. For our spaghetti we boiled them for 7 minutes.
  3. While the spaghetti are boiling, finely chop the onion, the chili and the parsley.
  4. Crush the garlic and drain the capers.
  5. Add all the ingredients in a big bowl.
  6. Add the canned tuna.
  7. Mix the lemon juice with the olive oil and pour the resulting sauce over the ingredients.
  8. Toss everything until it is well combined.
  9. Drain the pasta, add them to the sauce and mix well.


It is barely cooking, but the result is really delicious and comforting it is it worth saving the recipe for hard times, lazy nights, pasta craving or any other culinary emergencies.
I hope you try.


Enjoy,

Thursday, October 24, 2013

Fig and Honey Yogurt- Easy Dessert Recipe | You've Got Meal!


 This post is more about an idea than an actual recipe.


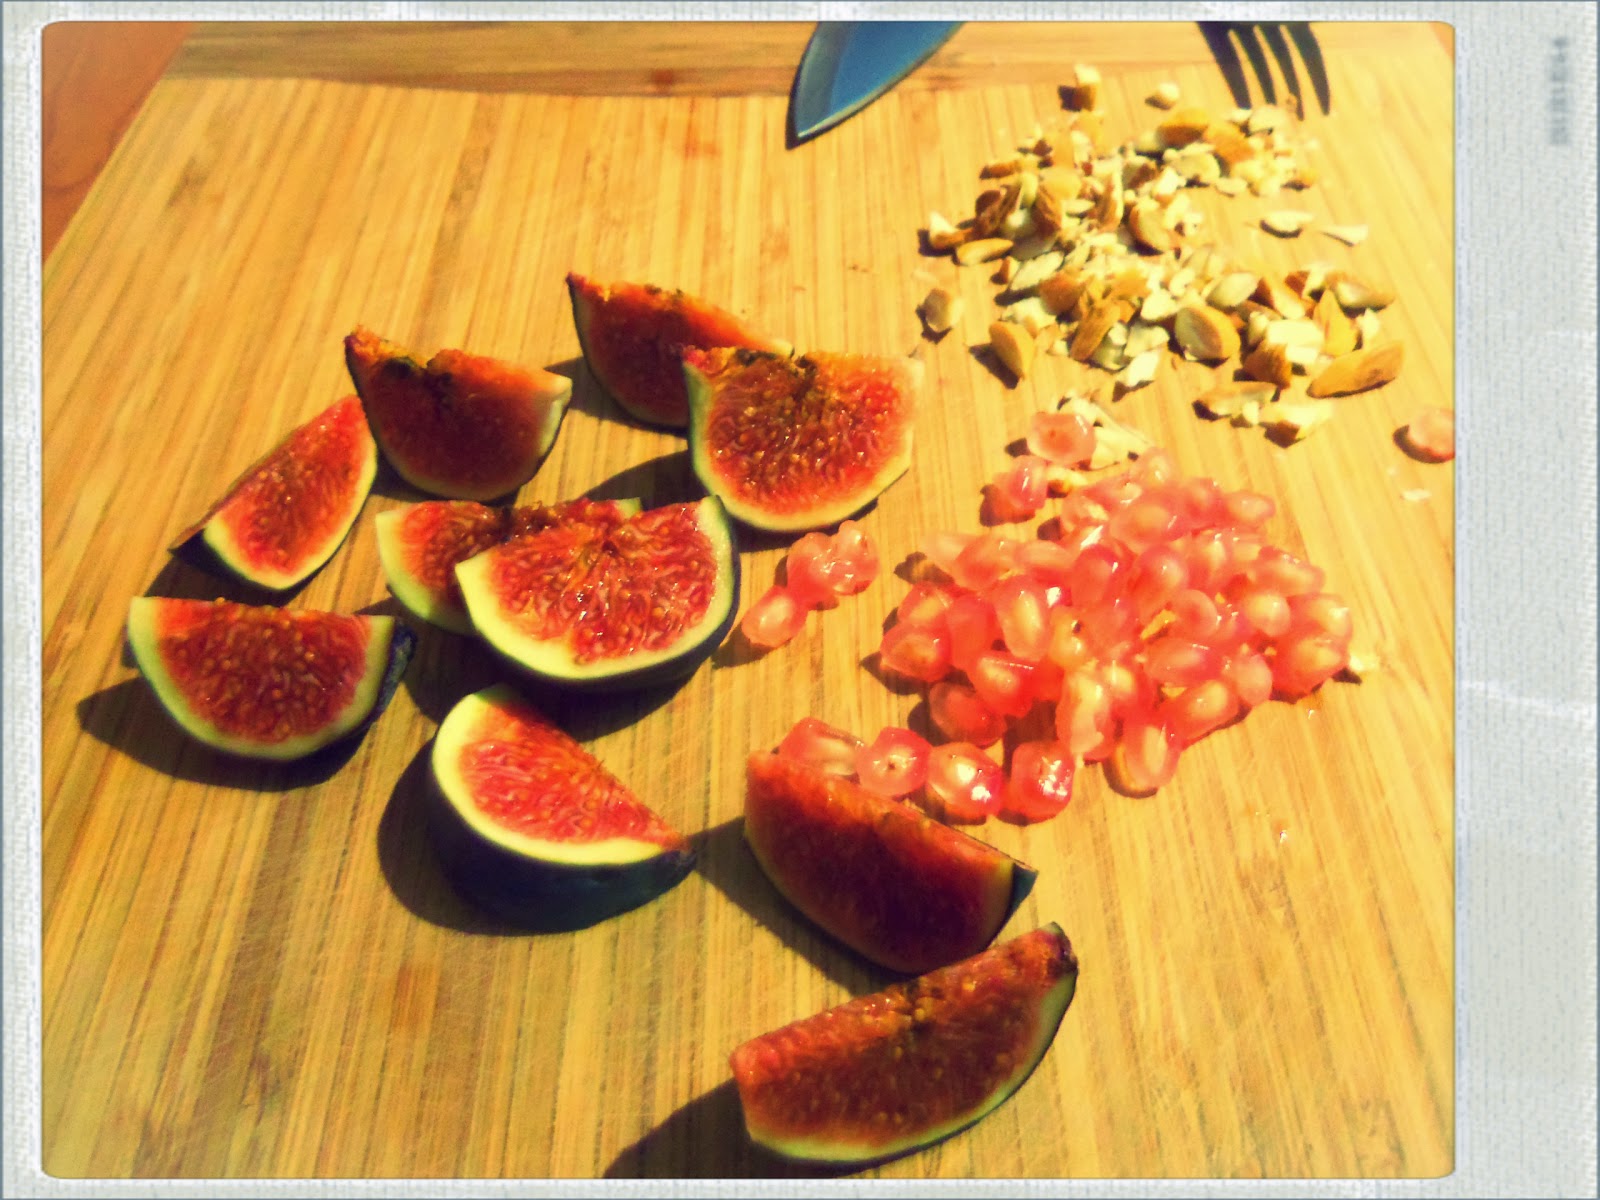
Mixing honey with yogurt is not a real brainstorm here, but you can use that base to build your own version of super easy, healthy and delicious dessert. Why bother to buy some artificial flavored yogurt or other type of sweets when you can make your own? For the version that we made for this post we decided to make the fig the star of the dish. Also, to bring a bit more crunch to the dessert we added some roughly chopped almonds. And to bring a little more zing to the whole dish , we sprinkled some pomegranate seeds on top.


 So, creamy yogurt, honey (use a flavorsome kind- acacia, orange blossom, pine tree, etc.), figs , almonds and pomegranate. Dead easy and incredibly savory. I’m sure you can think of many other combinations that can level this yogurt up, for example you can add a little touch of freshly grated ginger to spice things up or use some chopped fresh coconut as crunch. Go nuts, both literally and figuratively.   


Enjoy,

Saturday, October 12, 2013

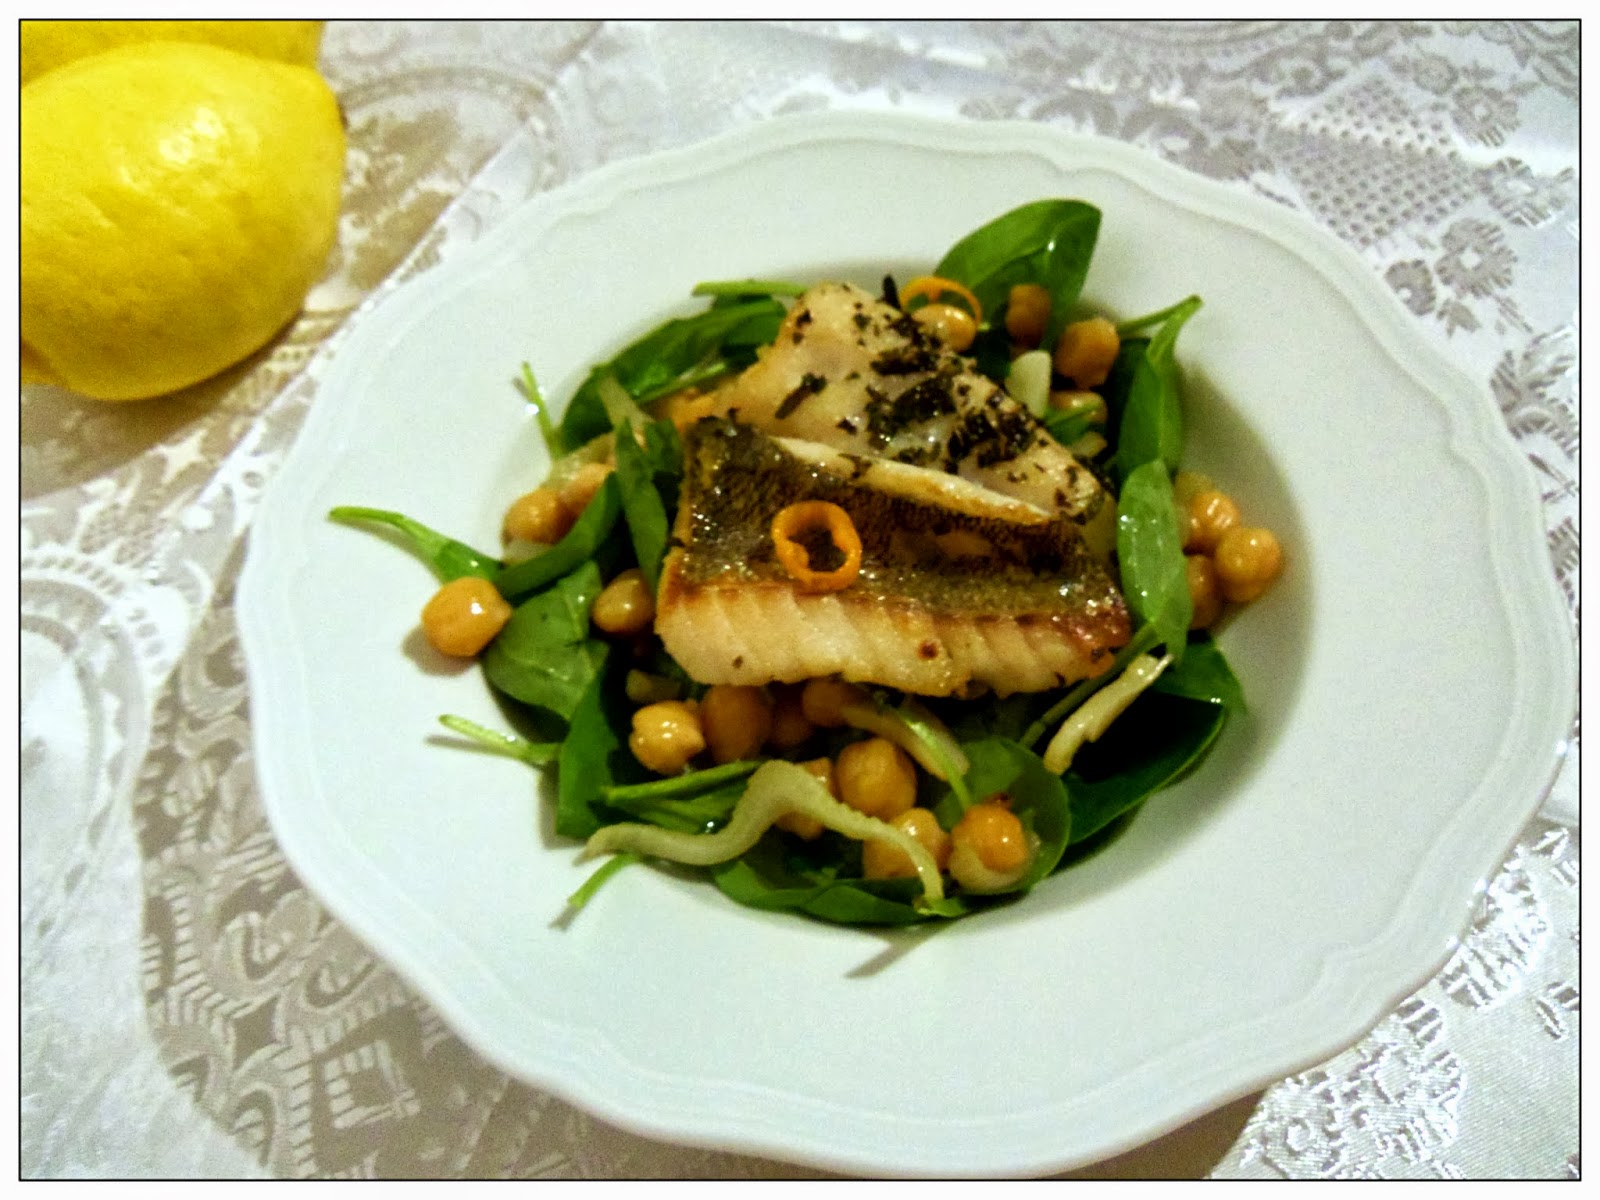
Fried Perch Fillet With Chickpeas And Spinach


This dish should be the picture front for the definition of light dinner. It’s subtle, light, flavorsome, super easy to make and a nice sight on the table. I used perch for this dish because I had it in the fridge, but feel free to substitute it with any fish at your convenience, be it fattier or not -  the side dish packs enough lemony, tangy taste to overcompensate for some salmon, for example.


The amount you use totally depends on how many people you plan on cooking for. For the side dish: chickpeas (for 4 portions I used around 100-130 grams of beans), 1 fennel bulb, 2-3 garlic cloves, lemon, 100 grams of baby spinach leaves, 1 chili, 1 tbs of sugar, salt, pepper, olive oil.


Boil the chickpeas, it helps if you keep it in water the night before. Remove the beans from water and put them aside. Slice the fennel, dice the garlic, slice the chili and pop them all in pan with some hot olive oil, cook on medium heat until the fennel softens. Add the chickpeas, sugar, salt, pepper and mix well to make sure the beans get coated in melting sugar. Add the juice of 1 lemon and, again, mix all the ingredients together, cook until all the liquid from the citrus has almost evaporated. You can now choose to mix the spinach leaves for a minute with the chickpeas still on the heat, thus mellowing the greens, or just mix them off the heat, keeping them crunchy (I prefer it that way). Sprinkle some more olive oil and lemon juice to the side dish if you feel the need to. 

To prepare the fish, just fry in it a pan with a couple tbs. of olive oil until cooked (the time depends on the type of fish and its thickness). Sprinkle some salt and pepper and place the fish on top of the chickpeas.  


Enjoy,

Friday, October 11, 2013

Parsnip Soup


Winter is coming! And not only in Game of thrones, but also in real life. You know, real life, that kind of stuff you read posts about on Facebook. Anyway, with summer fading away so did our beautiful vacation in Thassos (if you haven’t read about it you should. It’s illegal not to. Where, you ask? In your country, go figure), and so I decided to bring a touch of autumn in the YOUVEGOTMEAL! kitchen with this parsnip soup. 

You can find many varieties of this dish in the great world of Google, but, in case you didn’t know this about me, I tend to get lazy sometimes… maybe a lot. So I just clicked the 1st search result which was a Jamie Oliver variation of this soup.


I liked what I read, and, with a few changes from the Naked Chef, things went like this, ingredients wise:
  • 1 big onion                                            
  • 4-5 cloves of garlic (use a sweeter variety if you can)
  • 1 piece of ginger, thumb size
  • About 750 grams of parsnip, cleaned
  • A couple of bacon strips
  • 1 red or orange chilli (optional)
  • 750 grams of milk
  • About 1 l of vegetable stock
  • Nutmeg, turmeric, cumin, green pepper and salt
  • Olive oil 


The beautiful thing about a cream soup is that you don’t really have to bother to chop your veggies finely and this is not an exception. Chop everything roughly, anyway you feel like it. Heat up the oil and pop in the onion, garlic, ginger and spices. Gently fry the onion on a medium low heat until it softens. Add the parsnip and coat it in the aromatic onion-garlic mix. Add the liquids and cook the vegetables on medium heat until the parsnip softens. To test it just try and put a toothpick through it, if it goes in easily you have a winner. Remove from the stove and blitz the soup. Taste for more salt and pepper.

You can serve it like this, but for a more elaborate approach finely slice your chili, fry a strip of bacon, break a couple of parsley leaves (or coriander) and sprinkle that on top. I have nothing but love for you veggie lovers out there, but I can’t just say no to bacon. It just makes things better, like wine, you just need to know when to stop.


Enjoy,

Wednesday, October 9, 2013

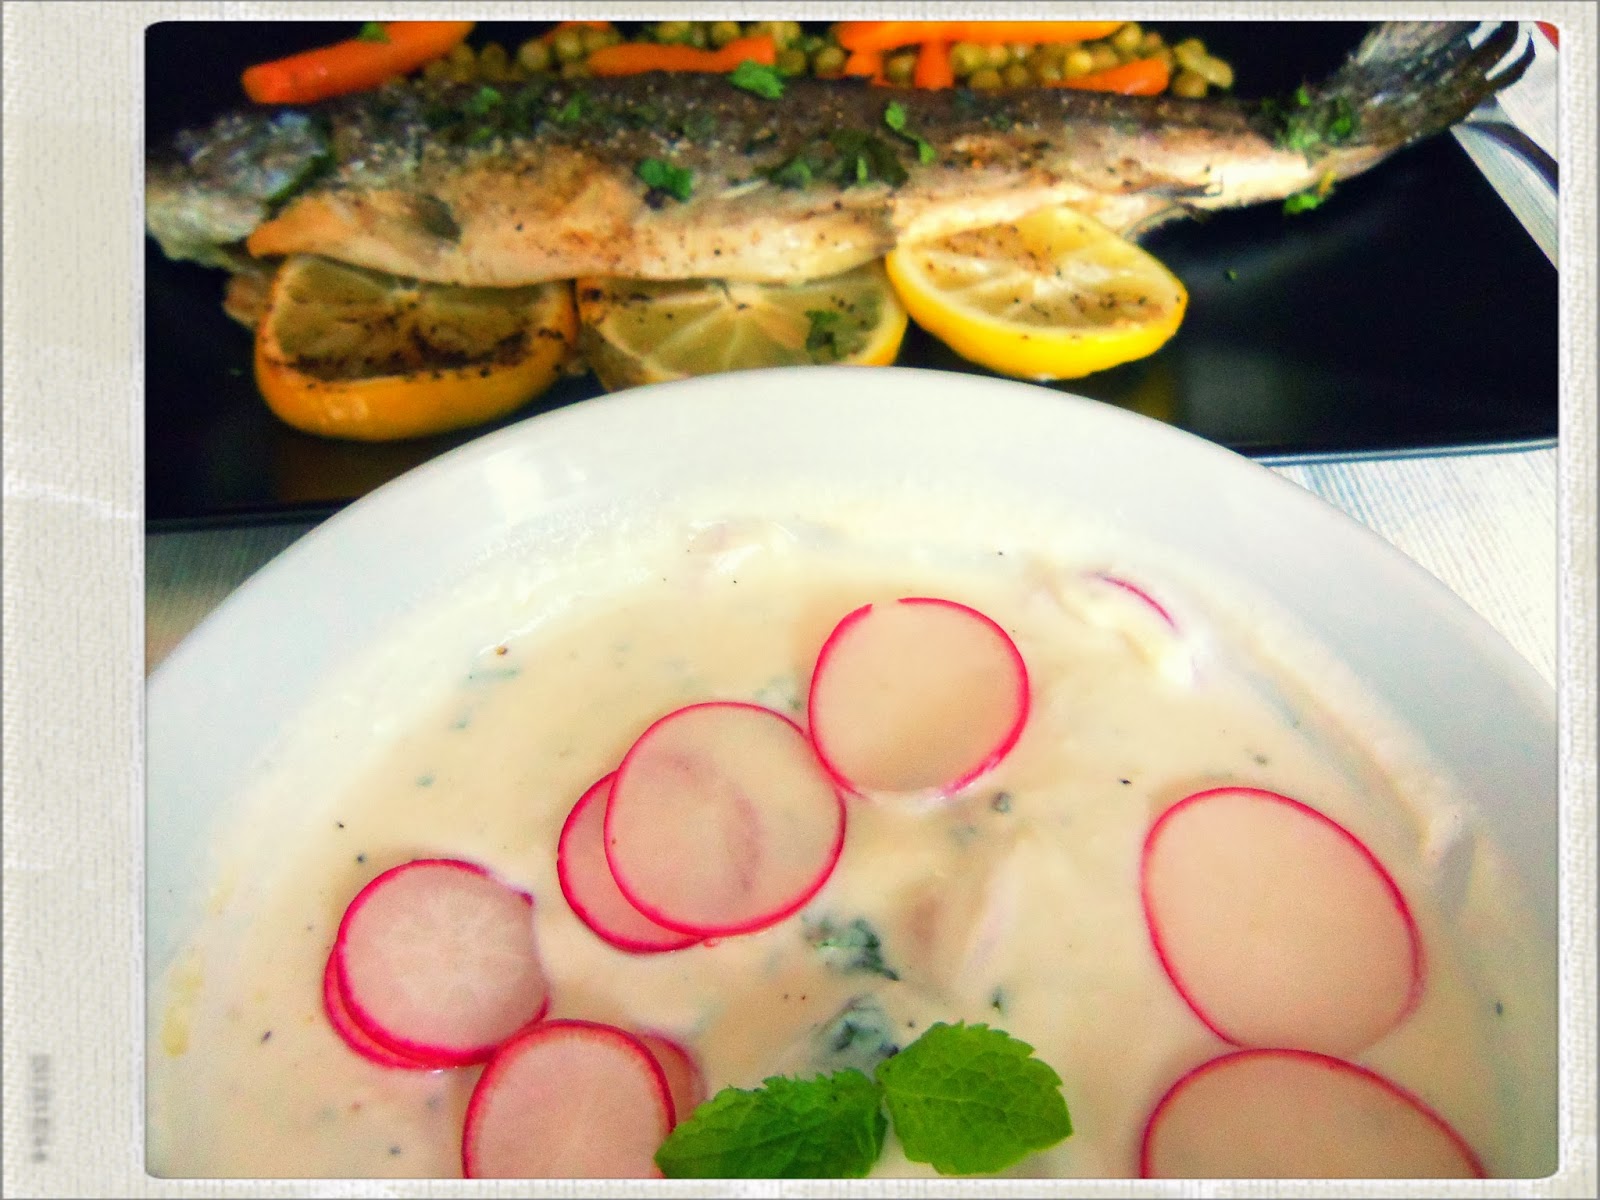
Oven Baked River Trout With Peas, Carrots And Yoghurt Sauce


This recipe is an incredibly easy one to make and prepare as it uses some very interesting ingredients that you just mix together for delicious results. It doesn’t take much time and you can prepare the side-dish and the sauce while the fish is cooking, making this a life saver when you’re  short on time.

  • For 2 fish, about 250 grams each, I used 
  • 1 lemon, cut into slices, 
  • some thyme branches, 
  • salt, pepper and olive oil. 

Clean and gut the fish, then place inside it some lemon slices and thyme branches. Place the trout in an oven tray with some ovenproof paper and sprinkle on top of the fish salt, pepper and olive oil. Let the fish cook on high heat for around 12 minutes.


The sauce really elevates this whole dish and it’s ridiculously easy to make. You’re going to need about 300 grams of creamy yoghurt (I used a combination of cow, sheep and buffalo cow with 10% fat), 3 cloves of garlic, crushed, 3 tbs of chopped mint, 3-4 small radishes, sliced thinly, salt, pepper and olive oil. Mix all the ingredients together and leave the sauce in the fridge.


For the peas and carrots I have to admit that I cheated and bought a can of pre-boiled veggies. That only needed one minute to heat up in a pan with some olive oil, no other fuss required.


Enjoy,

Thursday, September 12, 2013

Roasted Red Peppers Cream Soup


Sadly, it is that time of the year... we start to think about comfort food, warming stews, creamy soups and slow roasting. Me, personally, I will cling on to summer as much as I can, I'm just not a winter girl.

This recipe is perfect for every season, it is creamy and warming served hot in the colder days, but also quite light and silky served at room temperature in the summer.


You only need a few ingredients, you can go all vegetarian if you want, or you can add some cream  for more consistency.
5-6 roasted red peppers
2 small onions
2 bay leaves
3 springs of thyme
2 tbs olive oil
1 l vegetable or chicken stock
5 garlic cloves
salt and pepper
optional- cream for garnishing
optional- hot sauce or chilli flakes


Start by roasting the peppers. if you choose to roast them in the oven, also add the unpeeled garlic cloves in the tray. 15 minutes should be enough for the peppers and the garlic to be roasted. You can also roast the peppers on a grill or on a special oven top tray.


After roasting, peel the peppers and cut each one in half, removing the stem and the seeds. Also, squeeze the garlic out of the cloves and place it separately.

Heat up the oil in a large sauce pan and add the onion, the bay leaves and the thyme leaves from 2 springs. Cook this for 5-10 minutes, until the onion softens, add the stock, about 1/2 tsp of salt and 1/2 pepper, the garlic and the peppers. Cover, reduce heat and let it simmer for another 20 minutes.


Check for salt, turn off the heat, remove the bay leaves and with a hand blender or a food proccesor blend until smooth and creamy.

Serve in bowls and garnish with some cream (optional) and the remaining thyme spring. It is a wonderful dish and the smell of roasted peppers is irresistable to me, so it gets extra points for that. :) It is also so simple to make, you barely need any cooking skills and it is healthy. You can serve it with croutons, or if you want to fancy it up and impress someone you can also put together some parmesan crostini or garlic bread for added flavor.


Enjoy,

Sunday, August 18, 2013

Homemade Pizza (Summer Vegetables and Chorizo) and a Spicy Pizza Sauce Recipe


It took me just one visit to the farmer’s market a couple of days ago to realize the fact that we haven’t been using enough summer veggies in our dishes lately. Sure, we had broccoli and shrimps and rice and coconut, all nice and delicious, but where is the summer? With that in mind, I went on a shopping spree in the farmer’s market (believe it or not, this thing happens a lot more often that you might think) and bought a rather large quantity of veggies (tomatoes, zucchini, eggplants, cucumbers, peppers) and spices, all fresh (oregano, coriander, lemon thyme, parsley, sage, chili). 

Sunday, August 11, 2013

Fried Shrimp and Spicy Broccoli


This recipe is one of the first ones that made us into thinking we should make a blog and one of the recipes we like cooking the most. It’s a very easy to make, delicious and packs a lot of flavor. And, hey, you’re eating broccoli, that’s gotta be healthy for you.


For the shrimps, we used frozen (500 grams), but you can use fresh. The idea of cooking the seafood is that you will both boil and fry it for short periods of time, so it doesn’t over cook.

Tuesday, August 6, 2013

Beet-pickled Deviled Eggs- Appetizers August (1)


I have a great fascination for appetizers, they are highly appreciated at every party, they look good, they are usually finger food and it is easy to make an impression. It is a pity we don't make them often enough for ourselves.


Personally, I find that, at parties, especially wedding parties, I am only impressed by or drawn to appetizers. Maybe because you can have more flavors and tastes on one plate and my greedy, exploring taste buds appreciate that. With that in mind, I am going to dedicate this hot month to those simple bites that prepare us for the main course.


For today, I put together  some deviled eggs with goose pate, that as a bonus, are also mildly pickled with beet.

First, you will need to hard-boil 10 eggs and remove the shell.


For preparing the pickled eggs you will need:

1 red beet
1 onion
3 cups water
1 cup white wine vinegar
2 bay leaves
1 tbsp sugar

Bring this to o boil, then let it simmer for 30 minutes. Let it cool completely and then cover the boiled eggs with this mixture. In order for the eggs to get a nice colour you will need to let them in the beet water for at least 1 hour, and for a great taste also it need 2 hours. You can also let it sit overnight it is more convenient for you. The more you let it, the more color you will have when you cut them in half.


For the filling I used:

100g goose pate
2 tbsp sweet mustard
2 tbsp pickled horseradish (also beet-pickled)
1 tbsp finely chopped parsley


Mix all the ingredients above. Of course, you can use your usual horseradish, it happened that I had one with beets and more pink couldn't possibly hurt. If you don't have horseradish at all you can use a spicier mustard or you can just skip it alltogether for a sweeter finish.


When your mixture is ready and you are satisfied with its consistency, fill the eggs halves and garnish as you like.You could make it less thick with mayo or cream, but taste wise is definitely better without and they last longer to.


Don't they look good? Trust me, they are also very tasty and if you boil your eggs and the beet the day before it doesn't take much time or effort to put it together when you need it.

Enjoy,
Related Posts Plugin for WordPress, Blogger...